DIY Home Decor Ideas You Can Actually Do Yourself
There is a particular kind of half-finished room that comes from ambitious DIY. A wall with three test patches that never became a colour. A chair stripped back in April and still bare in October. A box of brass handles bought for a dresser that turned out to have the wrong hole spacing. Nobody puts these on Pinterest, but they are the honest result of picking projects by how good they look in a photograph rather than by what they actually involve.
The projects in this guide are chosen the other way round. Each one is something a reasonably careful person can complete over a weekend or two with tools that fit in a drawer, and each is described with the steps that actually matter, including the ones that get skipped and cause the finish to fail. Some cost the price of a takeaway. A few take patience rather than skill. None of them require a workshop, a van, or the ability to use a mitre saw.
Match the Project to the Skills, Time and Tools You Actually Have

Pick your first projects from the category that needs no permanent alteration and no specialist tools: painting, recovering, restyling and assembling. A basic kit of a cordless drill, spirit level, tape measure, utility knife, sanding blocks, painter’s tape, a staple gun and a caulking gun covers the large majority of home decor DIY. Anything requiring wiring or structural fixing belongs in a different category.
It helps to sort ideas into three honest tiers before you start buying anything.
The first tier is reversible and low risk: painting a small piece of furniture, swapping hardware, recovering a lampshade, making no-sew cushion covers, restyling shelves, propagating plants. These teach you the habits that make everything else go better, and a mistake costs almost nothing.
The second tier is semi-permanent and needs measuring: board and batten or slat walls, painted arches and colour blocking, hanging heavy mirrors and shelving, fitting curtain poles, laying peel-and-stick tile, refinishing a larger piece of furniture. Time and patience matter more than skill here, but a rushed measurement shows permanently.
The third tier is where most people should stop and hire someone: anything involving mains wiring, plumbing, gas, structural walls, or working at height above a stairwell. Rewiring a lamp is legal and simple in some places and not in others, and the risk is never worth the saving on a single light fitting.
On tools, buy as you go rather than assembling a hardware shop in advance. A decent cordless drill and a spirit level are worth spending real money on because you will use them for a decade. Sanding blocks in 120, 180 and 220 grit, a synthetic-bristle brush for water-based paint, a small foam roller for flat surfaces, and paintable acrylic caulk are cheap and appear in almost every project. Hire or borrow anything used once, such as a wallpaper steamer or a brad nailer.
Why Does DIY Decor Sometimes Look Homemade, and How Do I Avoid It?
The difference is almost always in preparation and edges, not in skill or budget. Projects that read as homemade tend to share the same faults: paint applied over an unclean or unsanded surface so it chips at the corners, brush marks from thick single coats, uncaulked gaps where new woodwork meets a wall, filler left unsanded, mismatched metal finishes in one room, and things hung slightly off level.
Fix those six things and even a very simple project looks intentional. Clean surfaces properly before painting, sand lightly between coats, use two or three thin coats instead of one thick one, caulk every seam where two materials meet, sand filler flush before painting, and check level twice on anything that touches a wall. Keep metal finishes consistent within a room, so handles, curtain poles, light fittings and hooks agree with each other. That kind of quiet coherence is what people read as professional, and it costs nothing.
Wall Projects That Transform a Room in a Weekend
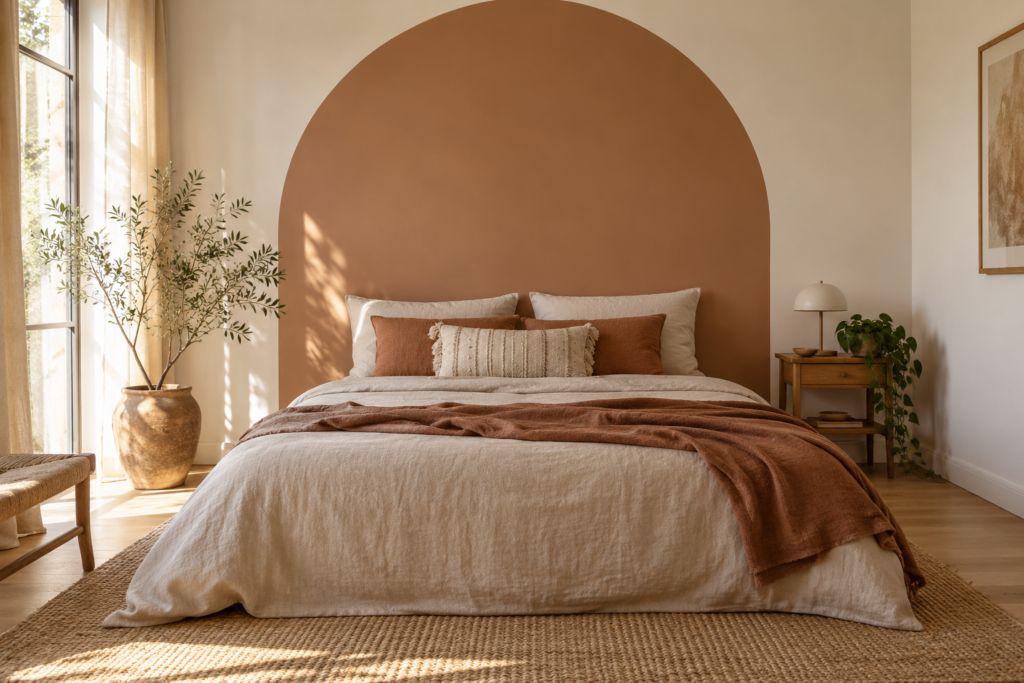
Walls give the biggest visual return for the least money because they are the largest surface in any room. The highest-impact weekend projects are paint used with intent, slim vertical battens, a colour-blocked or arched shape behind a bed or desk, and a properly planned gallery wall. All four are reversible or repaintable, and none need more than a level, a tape measure and patience.
Start with paint, but use it structurally rather than decoratively. Painting the walls, ceiling and woodwork in one colour, sometimes called colour drenching, makes a small or awkward room feel deliberate and removes the fussy boundaries that make a space feel chopped up. It works particularly well in a study, a hallway or a room with sloping ceilings. Order matters: ceiling first, then walls, then woodwork last so drips land on unfinished surfaces.
A painted arch or rectangle behind a bed, a desk or a console is the cheapest way to invent a focal point in a room that has none. Mark the shape with a pencil and a length of string pinned at the centre to draw the curve, run low-tack tape along the line, press the tape edge down firmly with a fingernail, then seal that edge by brushing a thin coat of the wall colour over it before applying the new colour. That seal step is the whole trick; it stops bleed and gives a knife-sharp line.
Board and batten or slat panelling sounds advanced and is mostly arithmetic. Measure the wall, decide on a batten spacing in the region of 12 to 16 inches, and divide so the gaps come out even rather than leaving a stub at one end. Fix the battens with construction adhesive and a few pins, check each one with a level as you go, fill the pin holes, caulk both long edges where the batten meets the wall, then prime and paint everything the same colour. The caulk line is what turns separate pieces of timber into what looks like original joinery.
Peel-and-stick wallpaper and tile deserve their reputation now, provided the surface is smooth, clean and dry. Textured walls defeat it. Work from a plumb line rather than the corner of the room, because almost no room is square, and overlap the pattern by the repeat rather than butting the edges together.
How Do I Make DIY Wall Art That Doesn’t Look Cheap?
Scale and framing do more than technique. Most homemade art looks homemade because it is too small and mounted badly, not because the painting is bad. Go large, leave generous space around the image, and use a wide mount inside the frame, because a deep border reads as gallery framing even on an inexpensive print.
Reliable projects include a piece of interesting fabric stretched over a stretcher frame and stapled at the back, textured abstract canvases made by dragging joint compound across a primed surface with a spatula and painting it once dry, pressed botanicals or ferns mounted on neutral card, and large-format prints of your own photographs ordered from a print shop and framed simply. Charity shop frames spray painted in a single consistent colour, with new mounts cut to size, cost a fraction of new framing and look considerably better than budget frames straight from a box.
For gallery walls, lay the arrangement out on the floor first, cut paper templates the size of each frame, and tape them to the wall to test heights and spacing before any nail goes in. Keep the gaps consistent at around 2 to 3 inches and treat the whole group as one rectangle whose centre sits at eye level.
Give Furniture You Already Own a Second Life
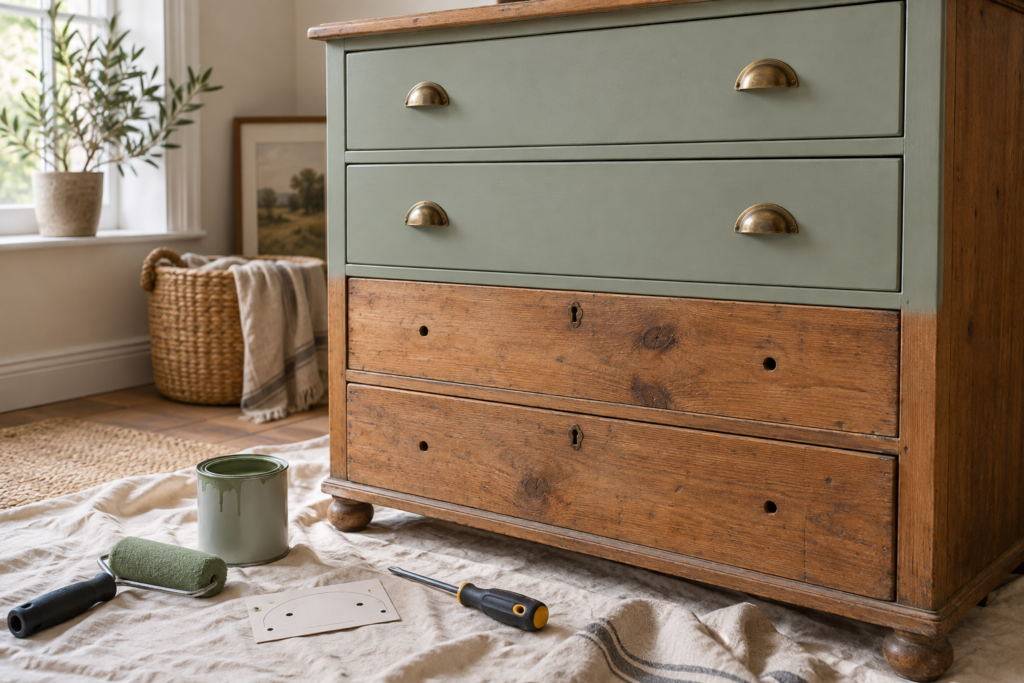
Painting and refinishing existing furniture is usually better value than buying new at the same price, because older pieces are more likely to be solid timber. The work is 80 percent preparation: clean thoroughly, scuff sand, prime with the right primer for the surface, then apply two or three thin coats of paint and a protective topcoat on anything that gets handled.
Clean first with a degreasing cleaner, not just a damp cloth. Kitchen and dining furniture carries invisible grease that stops paint bonding, and this single omission causes most peeling. Scuff sand with 120 to 180 grit just enough to dull the sheen, wipe the dust off with a tack cloth or a barely damp rag, and let it dry completely.
Primer choice does the heavy lifting. Bare timber that contains tannins, such as oak, mahogany or pine knots, will bleed yellow or pink through pale paint unless it is sealed with a stain-blocking primer, and the bleed can appear days later. Slick surfaces need a bonding primer. Skipping primer to save an hour is how a beautifully painted dresser ends up with brown patches by the following weekend.
Apply paint in thin coats, working with the grain, and sand lightly with fine paper between coats for a smoother finish. On flat panels a small foam roller followed by a light brush pass, sometimes called laying off, leaves fewer marks than brushing alone. Then protect it: a water-based topcoat on tabletops, drawer fronts and anything that meets hands or hot mugs. Remember that paint dries in hours but cures over weeks, so treat a newly painted piece gently at first and avoid stacking heavy objects on it immediately.
Hardware is the fastest transformation in this whole guide. Before ordering handles, measure the distance between the centres of the existing screw holes, because common spacings vary and a mismatch means filling and drilling. Common centres include 76mm, 96mm and 128mm. If you do need new holes, make a simple drilling template from a strip of card or scrap timber so every handle lands in exactly the same place on every drawer.
Other worthwhile furniture projects: replacing tired plinths with tapered wooden legs bought as a set, fitting cane webbing into the recessed panels of a cabinet door using glue and a bead of trim, lining the inside of drawers with paper or fabric, and recovering a drop-in dining chair seat. That last one is genuinely a beginner job. Unscrew the seat pad from underneath, lay new fabric face down, place the pad on top, then staple from the centre of each side outward, pulling firm and even tension and folding the corners like a parcel.
What Paint Should I Use on Laminate or Melamine Furniture?
Flat-pack furniture with a laminate or melamine surface can be painted successfully, but only with the right sequence. Clean it with a degreaser, scuff the surface lightly so it loses its shine, then apply a bonding or adhesion primer made specifically for slick surfaces. Once that has cured properly, use a hard-wearing water-based furniture or cabinet paint in thin coats and finish with a clear topcoat. Mineral and chalk-style paints can work on laminate too, but they still need the same degreasing and a sealing coat afterwards, because without a topcoat they mark easily. Do not skip the cure time between primer and paint; that wait is the reason the finish survives.
Lighting Upgrades That Need No Wiring

You can change almost every light in a home without touching the electrics. Recovering or replacing lampshades, repainting lamp bases, swapping bulbs for warm dimmable ones, adding plug-in wall lights, and fitting battery-powered puck lights or picture lights covers the overwhelming majority of lighting problems in rented and owned homes alike.
Start with bulbs, because they cost the least and change the most. Warm white bulbs in the region of 2700K suit living rooms and bedrooms, while slightly crisper 3000K works in kitchens and bathrooms. Look for a high colour rendering index so fabrics and wood look their proper colour. Keep the temperature consistent within a single room, since mixing warm and cool light in one space is a subtle error that makes everything look slightly wrong.
Lampshades respond well to DIY. A tired drum shade can be recovered by rolling it along the reverse of your chosen fabric, marking the shape, cutting with a small overlap, and attaching with spray adhesive while turning the shade slowly to keep tension even. Fold the raw edge under at the seam, and tuck the top and bottom overhang inside using a blunt tool. Choose a lightweight fabric, and never allow fabric to rest against the bulb.
Bases are equally easy. A ceramic or metal lamp base can be transformed with spray paint, applied in several light passes from roughly 10 to 12 inches away rather than one heavy coat, with the fitting and cord carefully masked off. Spray outdoors or in a well-ventilated space, and avoid painting in cold or damp conditions, because both cause a gritty or cloudy finish.
Plug-in wall sconces solve the classic problem of a room with no wired lighting where you need it, particularly beside a bed where bedside tables are too small for lamps. Run the cord down the wall inside a slim cord cover painted the wall colour, or let it hang deliberately as part of the look. Battery-operated picture lights and puck lights with remote controls are worth knowing about for alcoves, bookcases and artwork, where running a cable is impractical.
One safety note that is easy to overlook: respect the maximum bulb wattage marked on any fitting, and do not enclose a fitting in a shade that traps heat.
Soft Furnishings and Textiles Without a Sewing Machine

No sewing machine is needed for most textile projects. Iron-on hemming tape handles curtain and tablecloth hems, fabric glue and envelope folds make cushion covers, and a staple gun covers seat pads and headboard panels. These projects are also the cheapest way to change a room seasonally, since the work is in the fabric rather than the construction.
Curtains are the highest-value textile project. Ready-made curtains in the wrong length are inexpensive, and shortening them with iron-on hemming tape takes an evening: measure the drop from the pole to just above the floor, allow for the hem, press the fold, insert the tape and press again with the heat setting the tape specifies. Hang the pole 4 to 6 inches above the window frame and extend it 8 to 12 inches past each side, so the curtains stack against the wall rather than blocking the glass. That placement alone makes windows look larger and ceilings higher.
Painter’s drop cloths and plain cotton canvas make convincing heavy curtains for very little money, but wash and dry them before cutting, because they shrink noticeably and soften considerably on the first wash.
Cushion covers without sewing use the envelope method: cut a rectangle roughly three times the width of the cushion pad plus seam allowance, fold the two ends inward so they overlap in the middle, secure the top and bottom edges with fabric glue or iron-on tape, let it cure fully, then turn it out and insert the pad. Buy pads slightly larger than the cover so the cushion looks plump rather than limp.
A staple gun opens up two more projects. A simple upholstered headboard can be made from a sheet of plywood cut to size at the timber merchant, a layer of foam and wadding, and fabric pulled taut and stapled at the back, then mounted with heavy-duty wall fixings. A fabric-covered pinboard or a runner of fabric stapled inside an alcove works on the same principle at a fraction of the effort.
Dyeing existing textiles is underrated. Faded cotton or linen cushion covers, plain curtains and pale rugs can be taken to a deeper, more current shade with a machine dye, provided the fabric is a natural fibre. Synthetics take dye poorly and will come out patchy, so check the label before committing.
Can I Really Hem Curtains Without Sewing?
Yes, and for most household curtains the result is indistinguishable once they are hanging. Iron-on hemming tape creates a bonded hem that survives normal use and gentle washing, provided the fabric is a natural fibre or a stable blend and you follow the heat and pressing time on the packet. Press rather than glide the iron, work in sections, and let the hem cool completely before hanging. For very heavy or slippery fabrics, sewing or a professional alteration is still the better option, because the weight will eventually pull a bonded hem apart.
Plant, Natural and Seasonal Decor You Can Make
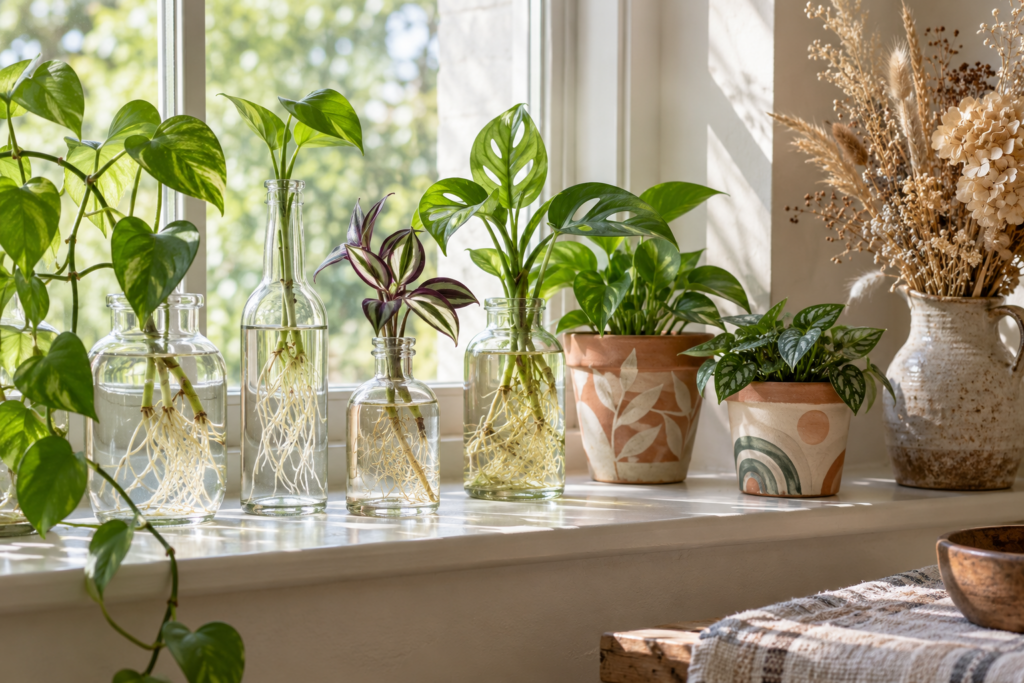
Living and natural materials are the cheapest decorative layer available, and most of it is free. Propagated cuttings, painted terracotta pots, dried flower arrangements, foraged branches and simple seasonal swaps cost almost nothing, look considerably more expensive than they are, and change through the year without any repainting.
Propagation is the obvious starting point. Cuttings from pothos, tradescantia, philodendron, monstera and many succulents root readily in water. Cut just below a node, remove the lower leaves so nothing sits below the water line, and place the cutting in a clear glass or bottle in bright indirect light. Change the water weekly. A row of glass vessels along a windowsill or in a wall-mounted propagation rack is genuinely attractive decor in its own right, and within a couple of months you have new plants to pot, keep or give away.
Terracotta pots take paint well and look far better than plastic. Give them a wash and let them dry fully, since terracotta holds moisture longer than you expect. Mineral or chalk-style paint gives a matte, slightly chalky finish that suits the material, and you can seal the exterior if you want it wipeable. Leave the drainage hole clear, and if you seal the inside, use a product suited to planters so the roots are not sitting against something unsuitable.
Drying your own flowers is a slow project with a long payoff. Hydrangeas, statice, strawflowers, lavender, eucalyptus and most ornamental grasses dry reliably. Cut them on a dry day, strip the lower leaves, bundle small bunches with an elastic band that will tighten as the stems shrink, and hang them upside down in a dark, dry, airy spot for two to three weeks. Dried arrangements last for months and cost nothing beyond what you grow or gather.
Seasonal rotation keeps a house feeling alive without new purchases. In spring, forced branches of blossom and simple bulbs in bowls. Through summer, loose garden bunches and greenery in plain jugs. In autumn, dried grasses, seed heads, branches and warmer textiles. In winter, evergreens, pine cones, citrus and candlelight. Store one small box for each season and rotate what you already own rather than buying more.
Two practical notes: gather responsibly, taking only small amounts from your own garden or from places where foraging is permitted, and check before bringing anything green into a home with cats or dogs, since several common houseplants and cut stems are toxic to pets.
Frequently Asked Questions
What are the best DIY home decor projects for a complete beginner?
Start with projects that are reversible and forgiving: painting a small piece of furniture, swapping cabinet or drawer hardware, recovering a lampshade, making no-sew cushion covers, hemming curtains with iron-on tape, and propagating plant cuttings. Each of these teaches preparation, measuring and patience without risking anything expensive, and each visibly changes a room in a day or less.
What basic tools do I need to start DIY decorating?
A cordless drill, a spirit level, a tape measure, a utility knife, a screwdriver set, sanding blocks in 120, 180 and 220 grit, painter’s tape, a caulking gun with paintable acrylic caulk, a staple gun and a set of wall anchors will handle most projects in this guide. Buy the drill and level properly, since they last for years, and borrow or hire anything you will use once.
Do I really have to sand furniture before painting it?
In almost every case, yes, at least lightly. The goal is not to strip the piece back but to dull the existing sheen so primer and paint can grip. Clean with a degreaser first, scuff sand with 120 to 180 grit, remove all dust, then prime. Paints advertised as requiring no preparation still perform far better with a clean, scuffed surface underneath.
How do I hang heavy mirrors or shelves on plasterboard walls?
Find the studs with a stud finder and fix into them wherever possible, because a fixing into timber is always stronger than one into board alone. Where no stud lines up, use anchors rated for more than the weight of the item, such as toggle or metal expanding anchors for heavier loads rather than basic plastic plugs. Check the manufacturer’s weight rating, spread the load across two fixings, and always use a level.
Can renters do DIY home decor projects?
Most of the projects here suit rentals. Painting furniture, recovering lampshades, making cushion covers and curtains, adding plug-in lighting, using removable wallpaper, leaning art and mirrors, and building a plant collection all leave no trace. For anything fixed to a wall, check your agreement first, keep the original fittings in a labelled box, and budget a little time to fill and touch up holes when you move out.
How much does DIY home decor actually cost?
It varies enormously, but the pattern is consistent: paint, hardware, textiles and plants are inexpensive, while timber, framing and good tools are where money goes. A painted furniture project or a set of no-sew cushion covers is a small spend. A panelled wall or a properly framed set of large prints costs more but still lands well under the price of buying the equivalent finished. The genuine saving in DIY is labour, so choose projects where the labour is the expensive part.
How do I make inexpensive frames and art look more expensive?
Increase the scale, widen the mount, and unify the finish. A larger piece with a generous border inside the frame reads as gallery framing regardless of what it cost. Spray painting mismatched secondhand frames a single consistent colour turns a jumble into a set, and having mounts cut to size is one of the cheapest upgrades available. Then hang it properly, with the centre at eye level.
How long before painted furniture is safe to use normally?
Paint is usually touch dry within a few hours and can be handled carefully after a day, but it continues hardening for several weeks depending on the product, the temperature and the humidity. During that curing period, avoid stacking heavy objects on painted surfaces, dragging items across tabletops, or closing painted drawers and doors tightly against each other. Applying a suitable topcoat and waiting out the cure is the difference between a finish that lasts and one that marks in the first month.