Straw Bale Gardening: A Beginner’s Guide to Growing in Bales
Picture a vegetable garden with no digging, no tilling, and almost no weeding, set up on top of hard clay, a gravel patch, or even a driveway. It sounds too convenient to work, but that’s exactly what straw bale gardening offers. The bale itself becomes the container and the growing medium at the same time,…
Picture a vegetable garden with no digging, no tilling, and almost no weeding, set up on top of hard clay, a gravel patch, or even a driveway. It sounds too convenient to work, but that’s exactly what straw bale gardening offers. The bale itself becomes the container and the growing medium at the same time, slowly breaking down into rich compost while your tomatoes and peppers grow on top of it.
The method has won over gardeners with poor soil, small yards, and bad backs, along with plenty of people who simply want to try vegetables without committing to building beds. It isn’t effortless, though. Bales need a few weeks of preparation before planting, they dry out quickly, and they need regular feeding because straw contains very few nutrients on its own.
This guide explains how straw bale gardening works, how to choose and set up bales, the conditioning process that turns raw straw into a growing medium, what to plant and how many plants each bale can hold, and how to water, feed, and troubleshoot through the season.
How Straw Bale Gardening Works
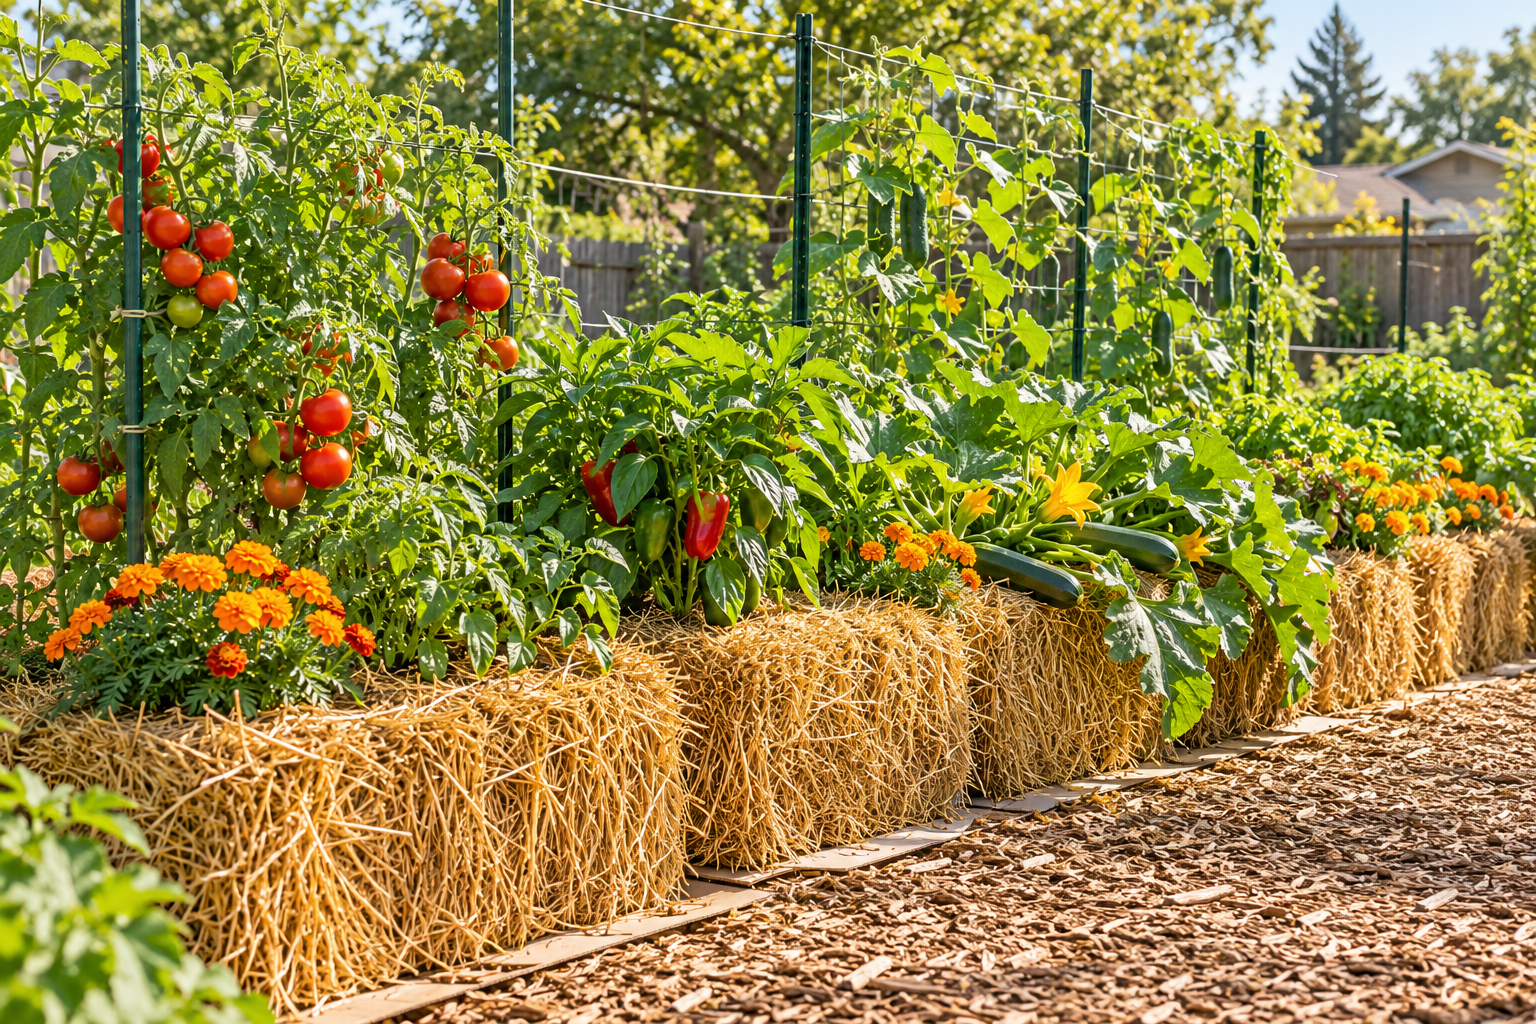
A straw bale garden uses tightly bound bales of straw as individual raised beds. Before planting, the bales are “conditioned,” a process of soaking them with water and adding nitrogen fertilizer over roughly two weeks. This kick-starts decomposition inside the bale, and as bacteria and fungi break the straw down, the inside becomes a soft, moist, compost-like material that roots can grow into.
Plants go into the top of the bale, either as transplants tucked into small pockets or as seeds sown into a thin layer of compost spread over the surface. As the season progresses, the bale continues to decompose, feeding the plants gradually and holding moisture around their roots.
Why Gardeners Choose Straw Bales
No soil required. Bales can sit on heavy clay, rocky ground, contaminated soil, gravel, or paving. That makes them a practical option for new-build gardens with poor fill, urban yards, and rented homes where digging isn’t an option.
Very few weeds. Because the growing medium is fresh straw rather than garden soil, there’s no existing seed bank of weeds waiting to sprout.
Raised height. A standard bale sits around 18–24 inches (45–60 cm) tall, so there’s much less bending and kneeling than in an in-ground garden.
Warmer roots in spring. The decomposition process generates heat, and bales warm up faster than cold spring soil, which can give warm-season crops an early boost.
Low setup cost. Bales are often inexpensive compared with lumber and bagged soil for raised beds, and at the end of the season they become compost or mulch.
Fewer soil-borne problems. Starting with fresh bales each year reduces the buildup of soil-borne diseases and pests that affects in-ground gardens.
The Trade-Offs
Straw bale gardening does have drawbacks worth knowing before you start. Conditioning takes around two weeks and requires daily attention. Bales dry out much faster than soil, so watering is a near-daily chore in summer. The straw has little natural fertility, so plants need regular feeding. Bales usually last only one season, or two at most, before collapsing into compost. And a row of bales looks rustic, which suits some gardens better than others.
For many people, those trade-offs are well worth it, especially where the alternative is fighting unworkable soil.
Choosing and Setting Up Your Bales
The success of a straw bale garden starts with buying the right bales and putting them in the right place, since bales become extremely heavy and hard to move once they’re soaked.
Straw or Hay: Which Is Better?
Straw is better than hay for bale gardening. Straw is the dry stalks left after grain crops such as wheat, oats, barley, or rice are harvested, and it contains relatively few seeds. Hay is cut grass or legumes grown as animal feed, often including seed heads, so hay bales tend to sprout heavy crops of grass and weeds.
Hay does break down faster and holds more nutrients, and some gardeners use it successfully, but it takes far more weeding. For beginners, straw is the easier and cleaner choice.
Even straw bales can sprout a flush of green grain seedlings from leftover seed. This is normal and easy to manage, as covered later in this guide.
Ask About Herbicides
This is one of the most important questions to ask any supplier. Some fields are treated with persistent herbicides that remain active in the straw long after harvest. These chemicals can survive composting and cause distorted, curled, stunted growth in sensitive crops like tomatoes, peppers, potatoes, and beans, sometimes killing them outright.
Buy from a farmer or supplier who can tell you how the grain crop was grown, and avoid bales of unknown origin. If you’re unsure, a simple test is to sow a few pea or bean seeds into a pot of moistened straw from the bale; if seedlings emerge twisted or cupped, avoid using those bales for vegetables.
Choosing Bales
Look for tightly bound, rectangular bales held together with two or three strings or wires. Loose, lightweight, or crumbling bales fall apart early. Standard small square bales are the most common choice, though sizes vary by region. Avoid bales that are already moldy, soggy throughout, or that smell sour.
Many garden centers and farm stores sell straw bales in spring and autumn, and local farmers are often the best source.
Picking the Site
Choose a spot that receives at least six to eight hours of direct sun a day for fruiting crops such as tomatoes, peppers, squash, and cucumbers. Leafy greens and herbs can manage with a little less.
The ground should be reasonably level so water soaks evenly into the bale rather than running off one end. Keep the bales close to a hose or water source, since they’ll need frequent watering.
Bales placed on a lawn will kill the grass beneath them over the season. To prevent weeds growing up into the bales from below, lay a sheet of cardboard or landscape fabric on the ground first. On paving or a driveway, be aware that water draining from bales during conditioning can carry brown tannins that may stain light-colored surfaces.
Positioning the Bales
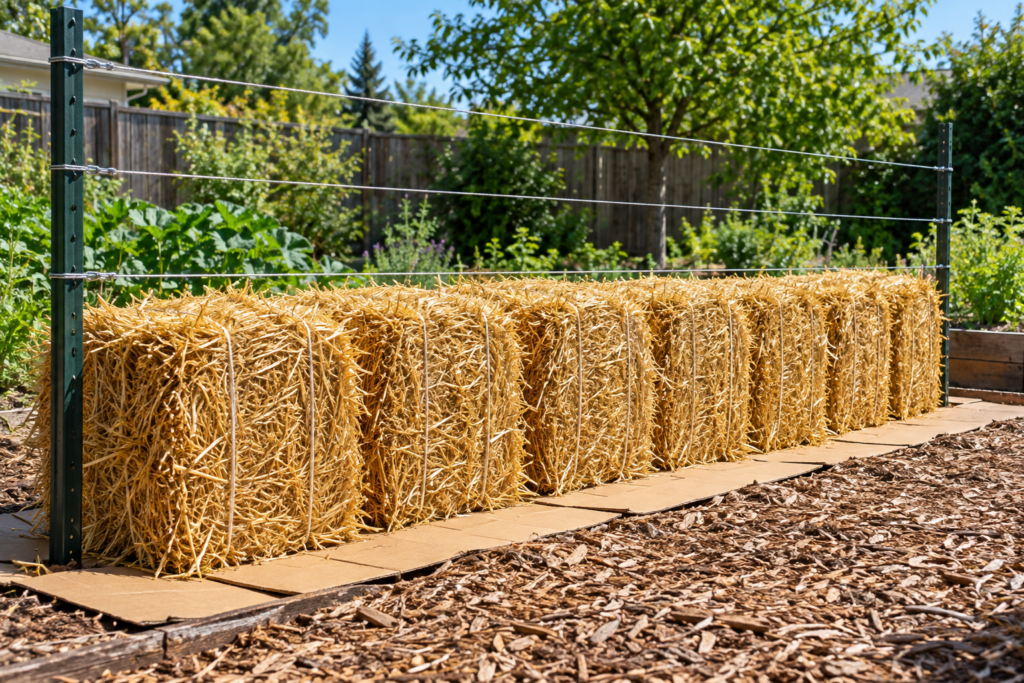
Position each bale on its narrow edge, so the strings or wires run around the sides rather than across the top and bottom. This keeps the strings off the damp ground, where they’d rot faster, and puts the cut ends of the straw stalks facing upward, where they absorb water readily like bundles of straws.
Arrange bales in rows with the long sides touching, leaving paths of about 2–3 feet (60–90 cm) between rows. Running rows east to west, with taller crops on the north side (in the Northern Hemisphere), reduces shading of shorter plants.
Install Supports First
If you’ll be growing tall or climbing crops such as tomatoes, cucumbers, pole beans, or melons, set up trellises before conditioning, while bales are still light enough to adjust and you can drive posts close to them without disturbing roots. A common setup uses sturdy metal posts driven into the ground at each end of a row of bales, with horizontal wires strung between them every 10–12 inches (25–30 cm) up to about 5–6 feet (1.5–1.8 m). A livestock panel secured to posts behind the bales also makes an excellent, rigid trellis.
Conditioning the Bales
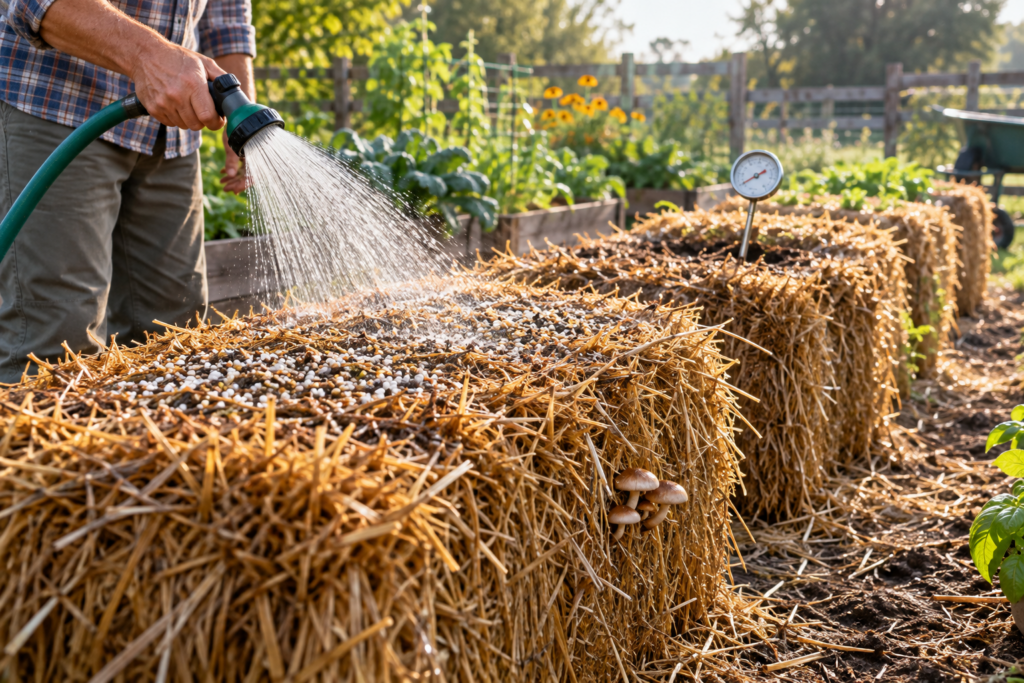
Conditioning is the step that makes straw bale gardening work. Raw straw is dry, carbon-rich, and nutrient-poor, and planting directly into it gives poor results. Conditioning adds water and nitrogen so microbes can begin decomposing the inside of the bale.
How Long Does It Take to Condition a Straw Bale?
Conditioning a straw bale takes about 10–14 days. During this time, you water the bales thoroughly every day and add nitrogen fertilizer on a set schedule, which starts decomposition inside the bale. The bale heats up as it breaks down, then cools, and it’s ready for planting once the inside feels no warmer than body temperature.
Start conditioning about two weeks before your planned planting date. For warm-season crops, that usually means beginning around your area’s average last frost date so bales are ready shortly after frost danger has passed.
A Typical Conditioning Schedule
This is a widely used general schedule based on conventional fertilizer. Adjust amounts to the size of your bales and the product label.
- Days 1–3: Water each bale thoroughly until water runs out of the bottom. On days 1 and 3, sprinkle about half a cup of a high-nitrogen fertilizer such as urea, or about a cup of standard lawn fertilizer without weed killer, evenly over the top of each bale and water it in.
- Days 4–6: Continue watering daily. On day 5, apply the same amount of nitrogen fertilizer again and water it in.
- Days 7–9: Keep watering daily and reduce the fertilizer to about half the earlier amount each day.
- Day 10: Apply a balanced fertilizer containing phosphorus and potassium, about a cup per bale, and water it in.
- Days 11–14: Water daily and monitor the bale’s temperature until it’s cool enough to plant.
Never use lawn fertilizers that contain herbicides (“weed and feed” products), since they will harm vegetables.
Conditioning Organically
Organic conditioning follows the same pattern but uses organic nitrogen sources such as blood meal, feather meal, or fish-based fertilizer. Organic fertilizers release nitrogen more slowly and are less concentrated, so they’re used in larger quantities, and conditioning can take a few days longer. Adding a few inches of finished compost on top of the bales can help speed the process by introducing active microbes.
Checking the Temperature
During conditioning, the inside of the bale heats up noticeably, sometimes becoming hot to the touch, as microbes break down the straw. This is a sign conditioning is working. Planting into a bale that’s still hot can burn young roots.
Push your hand deep into the top of the bale, or use a compost thermometer. When the interior feels about the same as your own body temperature or cooler, the bale is ready to plant. By the end of conditioning, the inside of the bale should look darker and feel soft and moist, like the beginnings of compost.
Mushrooms and Smells
Mushrooms often pop up on bales during or after conditioning. They’re a harmless sign that fungi are breaking the straw down. Don’t eat them, since many wild mushrooms are toxic, but there’s no need to remove them for the plants’ sake. A mild earthy or ammonia-like smell from the fertilizer is also normal during the first week and fades as conditioning finishes.
Planting Seeds and Transplants
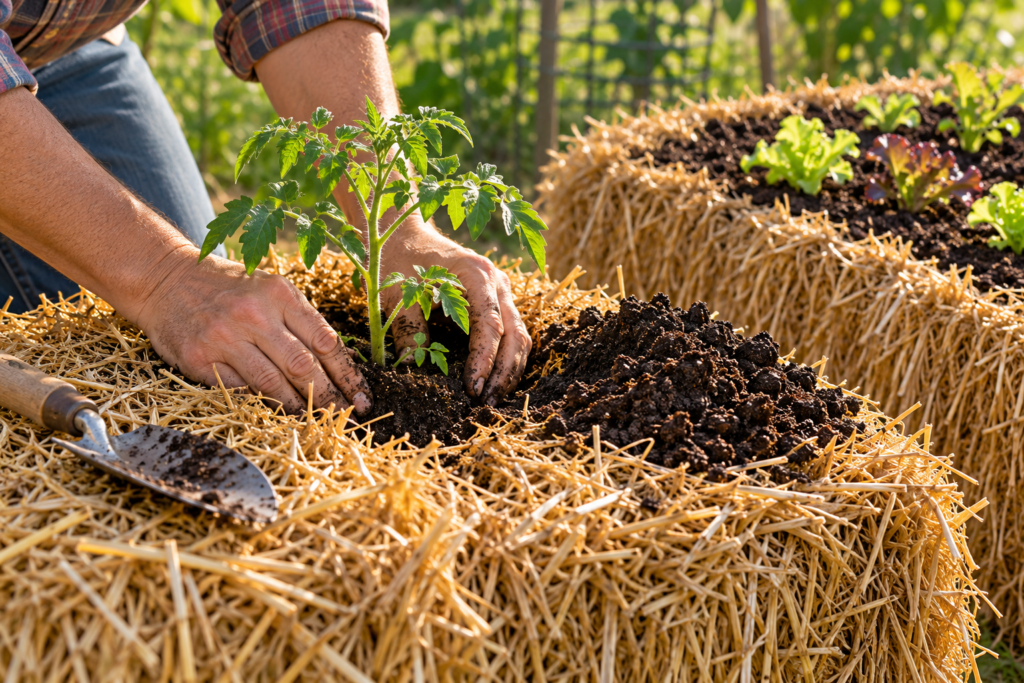
Once a bale is conditioned and cool, planting is quick. Both transplants and seeds work well, though transplants are the easier choice for beginners.
Planting Transplants
For tomatoes, peppers, squash, cucumbers, and similar crops, use a trowel to pry open a pocket in the top of the bale, pushing the straw apart rather than cutting it out. Make the hole about the size of the root ball. Add a handful of potting mix or compost into the pocket, set the transplant in at the same depth it was growing in its pot (or deeper for tomatoes, which root along buried stems), and fill around it with more potting mix. Water well.
Sowing Seeds
Seeds can’t germinate well in coarse straw alone, so create a seedbed on top of the bale. Spread a layer of about 1–2 inches (2.5–5 cm) of potting mix or fine compost over the surface of the bale, then sow seeds into it according to the seed packet depth. Keep the seedbed consistently moist until seedlings emerge, since it dries out quickly on top of a bale.
Crops sown this way include lettuce, spinach, arugula, radishes, bush beans, and many herbs. Root crops that stay short, such as radishes and round or short carrot varieties, can work as well.
Planting the Sides
The sides of a bale are growing space too. Small pockets pushed into the sides can hold trailing herbs, strawberries, nasturtiums, or flowers such as marigolds, making each bale more productive and more attractive.
What Grows Best in Straw Bales?
Tomatoes, peppers, squash, zucchini, cucumbers, melons, and pumpkins grow exceptionally well in straw bales, as they thrive in warm, rich, decomposing straw. Lettuce, spinach, herbs, bush beans, strawberries, and many annual flowers also do well. Tall crops like sweet corn and perennial crops like asparagus and rhubarb are less suitable, since bales break down within a season or two.
How Many Plants Fit in a Bale?
Crowding plants into a bale leads to poor airflow and competition for water and nutrients. As a general guide for a standard bale:
- Tomatoes: 2 plants
- Peppers: 2–3 plants
- Zucchini and summer squash: 1–2 plants
- Cucumbers: 2–3 plants on a trellis
- Winter squash, pumpkins, and melons: 1–2 plants
- Lettuce and leafy greens: 4–6 plants, or a sown strip along the top
- Bush beans: 6–8 plants
- Herbs: 3–4 plants
- Strawberries: 3–4 plants on top, with more tucked into the sides
Vining crops that sprawl, such as winter squash and pumpkins, can trail over the side of the bale and along the ground or path, or climb a trellis behind the row.
Watering, Feeding, and Everyday Care
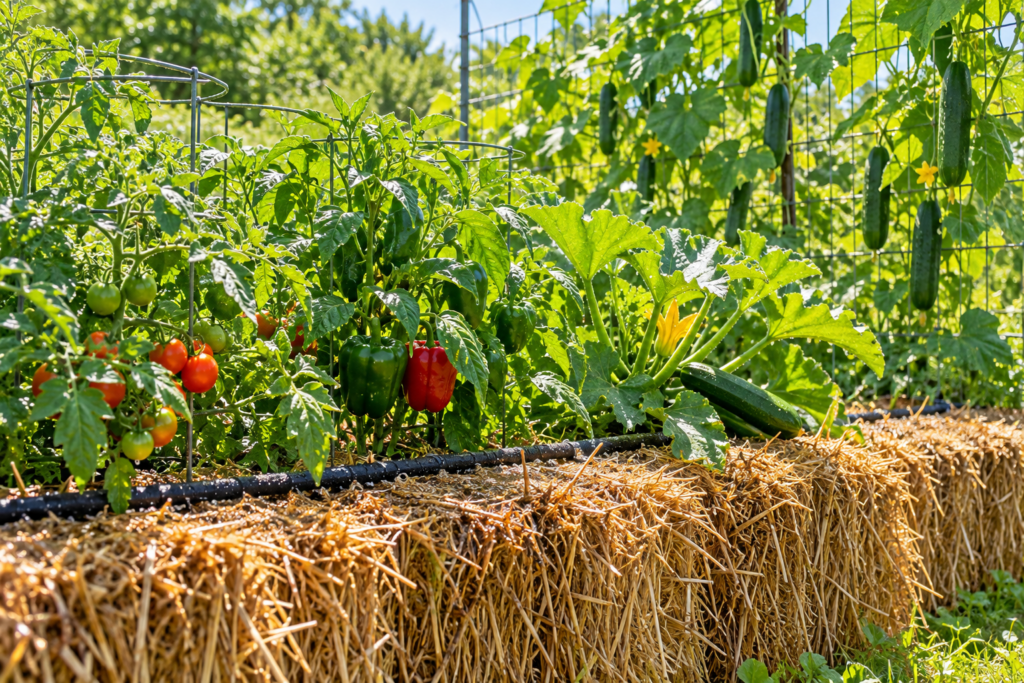
Once planted, a straw bale garden needs consistent attention to water and nutrients. The straw holds moisture well once conditioned, but its elevated, exposed position means it loses water quickly, and its low natural fertility means plants depend on regular feeding.
How Often Should You Water Straw Bales?
In warm summer weather, straw bales usually need watering every day, and sometimes twice daily during heat waves or once plants are large. In cooler weather, every two or three days may be enough. Push a hand into the top of the bale; if the inside feels dry rather than damp, water until moisture runs out of the bottom.
Never let bales dry out completely. Dry straw is surprisingly hard to rewet, and water tends to run straight through rather than soaking in. If a bale does dry out, water it slowly and repeatedly over a few hours so it absorbs moisture gradually.
Soaker Hoses and Drip Irrigation
Because bales need such frequent watering, many straw bale gardeners run a soaker hose or drip line along the top of each row of bales. Connected to a simple battery-powered timer at the tap, this delivers water directly into the bale at a slow, steady rate, which soaks in far better than a quick spray from a hose. Lay the line before planting so it’s easy to position between plants.
Water in the morning where possible so foliage dries during the day, reducing the risk of fungal disease.
Feeding Throughout the Season
Straw contains very few nutrients, and frequent watering flushes nutrients through the bale. Feeding regularly keeps plants growing strongly and producing well.
Apply a balanced liquid fertilizer every one to two weeks from planting onward. Once fruiting crops such as tomatoes, peppers, and squash start flowering and setting fruit, switch to a high-potassium feed, often sold as tomato fertilizer. Organic gardeners can use fish-based, seaweed-based, or compost-tea feeds on the same schedule.
Signs that plants need more food include pale or yellowing lower leaves, slow growth, and small fruit.
Supporting Plants
As plants grow and bales soften, tall crops can lean or pull away from the straw. Tie tomato stems and climbing crops to the trellis regularly as they grow. Stakes pushed into a soft bale don’t hold well, which is one reason a trellis anchored in the ground behind the bales is more reliable.
Pests and Diseases
Bale gardens avoid many soil-borne pests, but they aren’t pest-free. Slugs and snails often hide in the damp straw and come out at night, so check bales after dark and remove them. Aphids, squash bugs, and cucumber beetles may still find their way to plants, so inspect leaves regularly. Good spacing and morning watering help prevent fungal diseases like powdery mildew.
End of Season, Reuse, and Troubleshooting
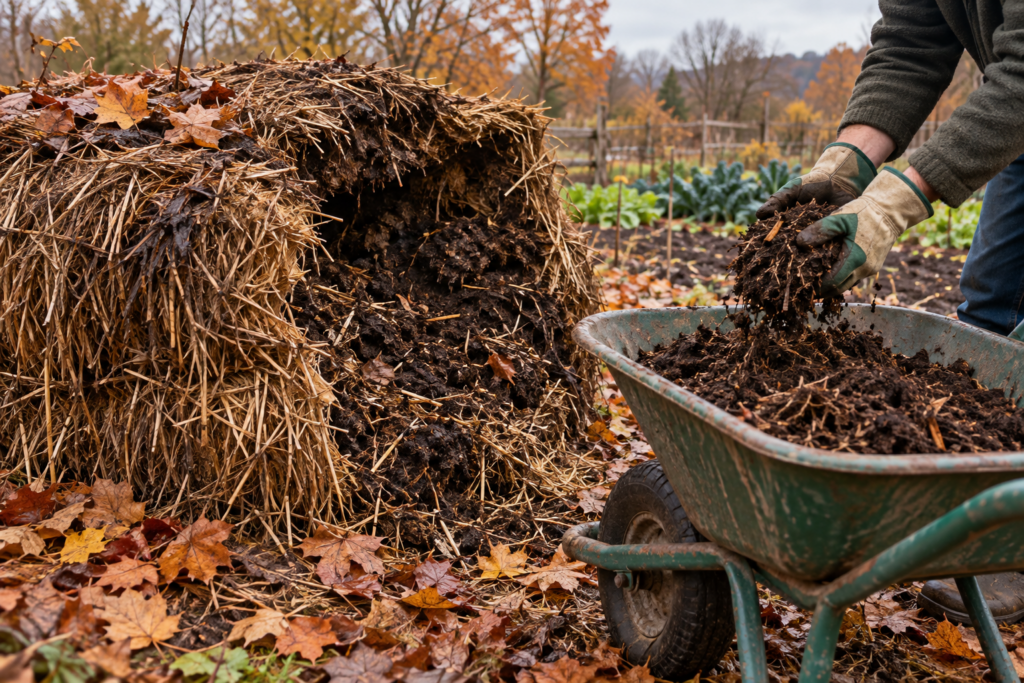
Straw bales transform steadily through the season, and by autumn they look very different from the tight golden blocks you started with. Knowing what to expect, and how to solve common problems along the way, makes the method far more predictable.
What Happens to the Bales
As the season progresses, bales soften, darken, and sag as the straw decomposes. By the end of the growing season, the inside is often dark, crumbly, compost-like material, and the strings may have rotted through.
Many bales can be used for a second season if they still hold their shape, though they’ll be smaller and softer. Plant them with crops that need less depth, such as lettuce, herbs, and strawberries, or top them with compost and use them as a raised bed. Bales that have collapsed make excellent compost or mulch: spread them over garden beds, add them to a compost pile, or use them to build new raised beds.
Common Problems and Solutions
Grass sprouting on the bales. Leftover grain seeds often germinate on the bales during conditioning, giving them a green, fuzzy top. This is harmless. Pull the seedlings by hand, cut them back with shears, or simply smother them with your compost seedbed layer. They rarely persist once plants establish.
Yellowing leaves. This usually means nitrogen deficiency, since decomposing straw consumes nitrogen. Increase feeding with a balanced or nitrogen-rich liquid fertilizer.
Wilting plants. Check whether the bale has dried out inside. Increase watering frequency, and consider adding a soaker hose on a timer.
Seedlings burned or dying soon after planting. The bale may still have been too hot when planted, or fertilizer salts may be too concentrated. Water heavily to flush the bale and wait until it cools before replanting.
Twisted, curled, or cupped leaves on tomatoes, peppers, or beans. This can be a sign of herbicide contamination in the straw. There’s no reliable fix for contaminated bales, so replace them and ask future suppliers about herbicide use.
Bales splitting or collapsing early. Loosely tied bales or strings that rot quickly can cause bales to fall apart. Use tightly bound bales, position strings on the sides, and wrap a band of twine or wire around weak bales to hold them together.
Common Straw Bale Gardening Mistakes
Skipping or rushing conditioning. Planting into raw or still-hot bales leads to poor growth or dead transplants. Allow the full conditioning period and check the temperature.
Using hay instead of straw. Hay usually causes far more weed problems.
Letting bales dry out. Dry bales are difficult to rewet and stress plants quickly.
Forgetting to feed. Straw provides little nutrition on its own. Regular feeding is essential.
Placing bales in the wrong spot. Once soaked, bales are too heavy to move easily, so choose the site carefully before conditioning.
Overcrowding plants. Too many plants in one bale compete for water and nutrients and reduce yields.
For all its quirks, straw bale gardening turns ground that’s unworkable into a productive vegetable patch within a few weeks, and it leaves behind a pile of rich compost to improve the garden for years to come.
Frequently Asked Questions
Where can I buy straw bales for gardening?
Straw bales are sold at farm supply stores, many garden centers, and directly from local farmers, especially in spring and autumn. Bales sold as seasonal decorations in autumn can also work well for gardening the following spring. Buying from a farmer lets you ask how the grain crop was grown, which matters for avoiding herbicide contamination.
Can I do straw bale gardening on concrete or a driveway?
Yes, straw bales work well on concrete, paving, and gravel, which makes them useful where there’s no soil at all. Water draining out of bales during conditioning can carry brown tannins that may stain light-colored surfaces, so consider placing bales on a sheet of plastic, a tray, or a spot where staining won’t matter.
Do straw bales attract rodents?
Straw bales can attract mice and other rodents seeking shelter, especially in autumn and winter, though straw draws fewer than hay because it contains less seed. Remove bales or break them down after the growing season, avoid storing bales against buildings, and keep food scraps and birdseed away from the garden to reduce the risk.
Can you grow potatoes in straw bales?
Yes. Plant seed potatoes by pushing them into pockets in the top of a conditioned bale, about 4–6 inches (10–15 cm) deep, and cover them with straw or compost. As plants grow, add more loose straw around the stems. Harvesting is simple, since you just pull the bale apart to find the potatoes, which come out clean.
Can you grow flowers in straw bales?
Yes, many annual flowers grow well in straw bales, including marigolds, zinnias, nasturtiums, petunias, and sunflowers of compact varieties. Flowers can be planted on top of bales or tucked into pockets on the sides, where trailing types spill down attractively. Mixing flowers with vegetables also helps attract pollinators to crops like squash and cucumbers.
When should I start a straw bale garden?
Start conditioning bales about two weeks before you plan to plant. For warm-season vegetables, that usually means beginning around your area’s average last frost date so bales are ready shortly after frost danger passes. You can also condition bales in late summer for a crop of cool-season vegetables like lettuce, spinach, and kale in autumn.
Do straw bales smell during conditioning?
Straw bales may give off a mild earthy smell or a slight ammonia odor from nitrogen fertilizer during the first week of conditioning. This is normal and usually fades as decomposition progresses. A strong, sour, or rotten smell can indicate the bales were already moldy or waterlogged when bought, so choose fresh, dry bales from the start.
Keep Learning
For more beginner help, see How to Start a Garden: The Complete Beginner’s Guide, How to Start a Vegetable Garden: Step-by-Step Guide for Beginners, and Vertical Gardening Systems: How to Grow Up, Not Out.