
Raised Bed Gardening: The Complete Guide for Home Gardeners
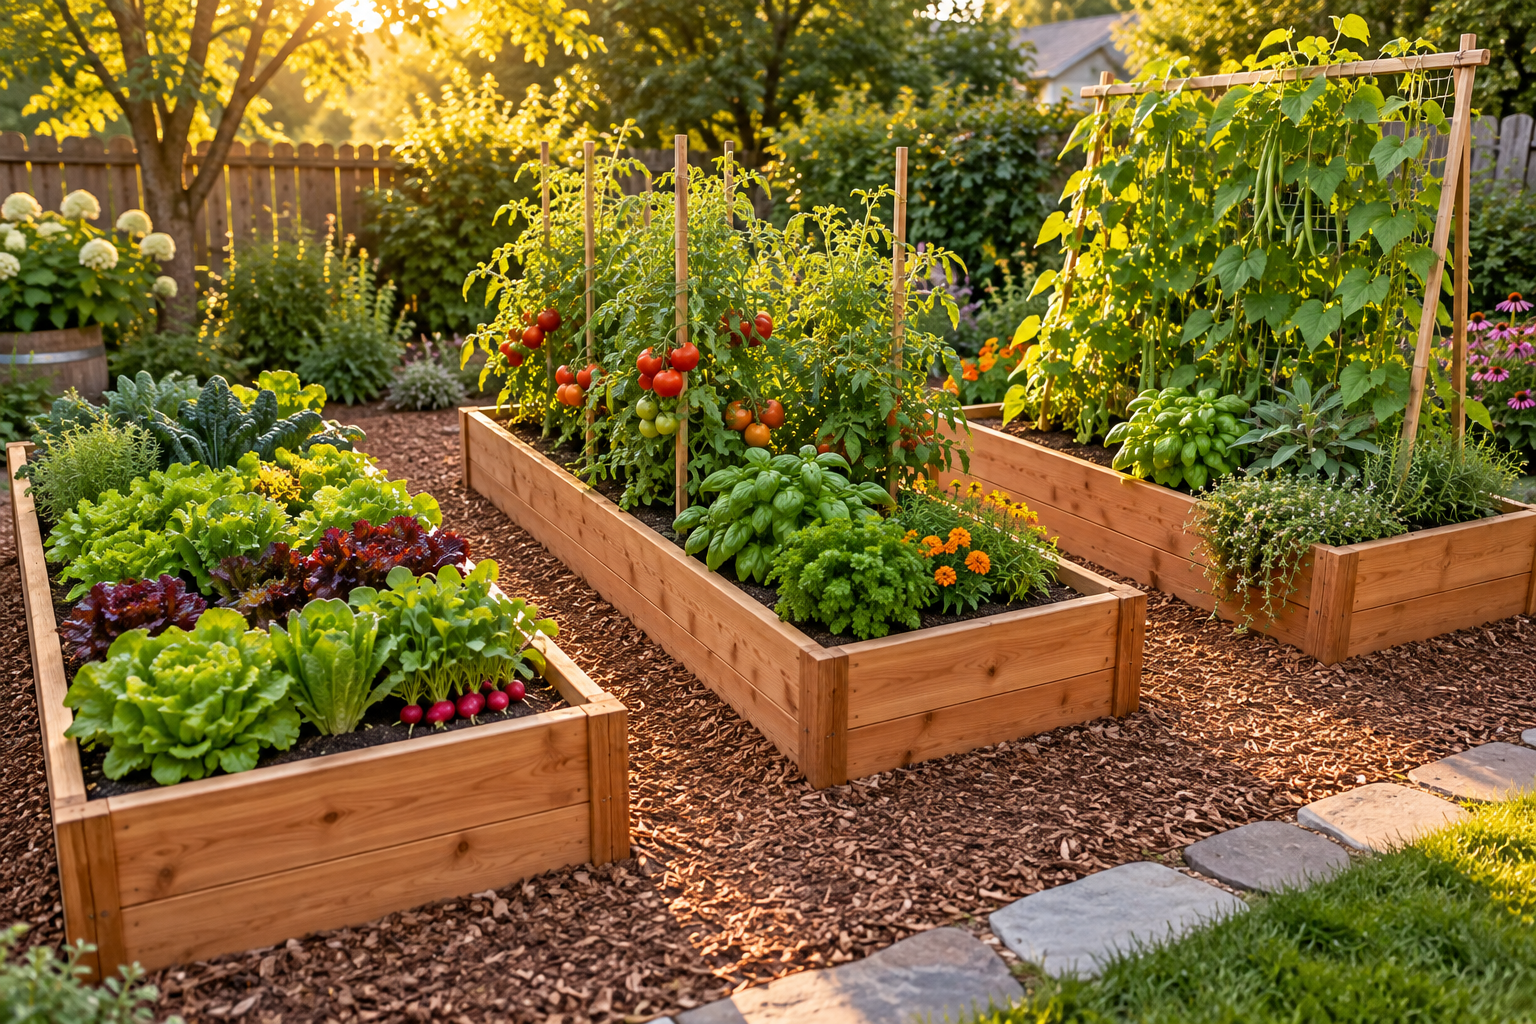
A raised bed sounds almost too simple to make much difference: a frame, some soil, a few plants. Yet gardeners who switch from digging rows in the ground often say the same thing after one season. The soil stays loose, the weeds are easier to manage, the beds warm up earlier in spring, and the…
A raised bed sounds almost too simple to make much difference: a frame, some soil, a few plants. Yet gardeners who switch from digging rows in the ground often say the same thing after one season. The soil stays loose, the weeds are easier to manage, the beds warm up earlier in spring, and the whole garden suddenly feels manageable instead of overwhelming.
That’s the real appeal of raised bed gardening. It gives you control over the one thing most gardens get wrong, which is the soil. Whether your yard sits on heavy clay, rocky ground, compacted builder’s fill, or a thin layer of sand, a raised bed lets you start fresh with a growing mix that suits vegetables, herbs, and flowers from day one.
This guide covers the full process, from deciding whether raised beds suit your garden, through choosing a material and size, filling the beds without overspending, planting them intensively, and keeping them productive for years. It also covers the mistakes that cost beginners the most time and money, so you can skip them.
Why Raised Beds Work So Well
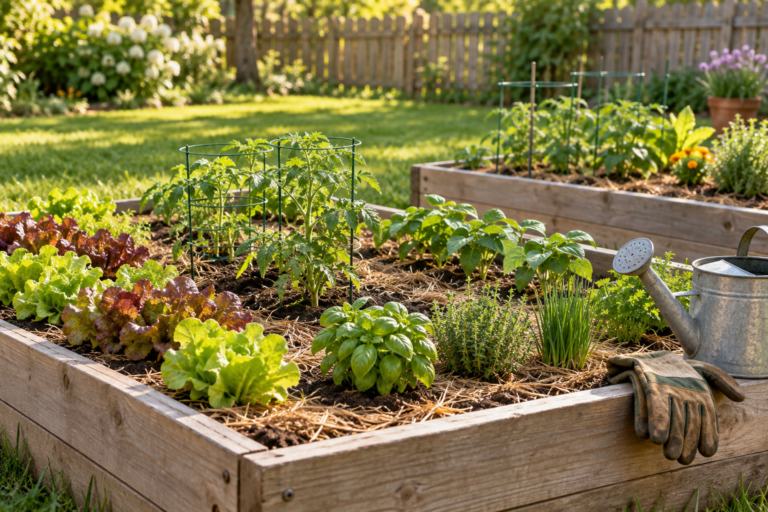
A raised bed is a contained growing area built above the surrounding ground, usually framed with wood, metal, stone, or composite boards and filled with a blend of soil and compost. Its advantages come from a few simple physical changes.
Better drainage. Because the growing area sits above ground level, excess water drains away instead of pooling around roots. This matters most in clay soil or low-lying yards where in-ground beds stay waterlogged after rain.
Soil that never gets compacted. Nobody walks on a well-designed raised bed. Every time a foot presses on garden soil, it squeezes out the air pockets roots and soil life depend on. Keeping feet on the paths means the growing area stays loose and crumbly year after year, with far less digging.
Earlier planting in spring. Raised soil warms and dries out faster after winter, so you can often sow and plant a week or two earlier than in the open ground.
Easier access. A bed that’s 12 inches (30 cm) tall already reduces bending. Beds built to 24–30 inches (60–75 cm) can be worked while seated or standing, which makes gardening possible for people with back or knee problems and for wheelchair users.
Fewer weeds. A bed filled with fresh soil and compost starts almost weed-free, and the defined edges make it much harder for lawn grass and creeping weeds to invade.
A clean start on poor or contaminated ground. If your native soil is rocky, extremely sandy, or possibly contaminated with lead or other residues (common near older houses and roadsides), a raised bed filled with imported soil keeps your crops’ roots in a growing medium you trust.
Are Raised Beds Better Than In-Ground Gardening?
Raised beds are better when your native soil is poor, drains badly, or is hard to work, and when easier access matters to you. In-ground beds are better when you already have good loamy soil, garden on a large scale, or live in a hot, dry climate where raised soil dries out too quickly. Neither is universally superior.
Raised beds do have real drawbacks. They cost more to set up, since you pay for both the frame and the fill. They dry out faster than ground-level soil, especially in summer heat and wind, so they need more frequent watering. Sprawling crops like pumpkins, winter squash, and melons can quickly overwhelm a small bed. And very tall beds need a surprising volume of soil to fill.
Many experienced gardeners end up with a mix: raised beds for salads, herbs, carrots, and tomatoes near the house, and in-ground rows elsewhere for space-hungry crops like squash and corn.
Choosing the Right Size, Material, and Spot
Getting the dimensions and location right at the start saves years of frustration, because moving a filled raised bed is heavy, awkward work.
Width matters most. Beds should be no wider than you can comfortably reach to the center from either side, which for most adults means 3–4 feet (90–120 cm). If a bed sits against a fence or wall and can only be reached from one side, keep it to 2–3 feet (60–90 cm) wide.
Length is up to you and your space. A 4 x 8 ft (120 x 240 cm) bed is a popular standard because it fits common lumber lengths with little waste. Beds longer than about 8 feet benefit from a cross brace in the middle, since the weight of wet soil can push the long sides outward over time.
Paths between beds should be at least 18–24 inches (45–60 cm) wide for comfortable kneeling and walking. If you’ll be pushing a wheelbarrow, allow about 3 feet (90 cm). Wood chips, gravel, or mown grass all work for paths; wood chips are easy on the knees and suppress weeds.
How Deep Should a Raised Bed Be?
For most vegetables, a raised bed should be 10–12 inches (25–30 cm) deep when it sits on reasonable soil, since roots can continue down into the ground beneath an open-bottomed bed. Over heavy clay, rock, or hard surfaces, aim for 18–24 inches (45–60 cm) so deep-rooted crops have enough room.
Shallow-rooted crops such as lettuce, spinach, radishes, and most herbs manage happily in 6–8 inches (15–20 cm). Tomatoes, carrots, parsnips, potatoes, and squash appreciate 12 inches or more. Taller beds of 24–30 inches are primarily about comfort and access rather than plant needs.
Comparing Raised Bed Materials
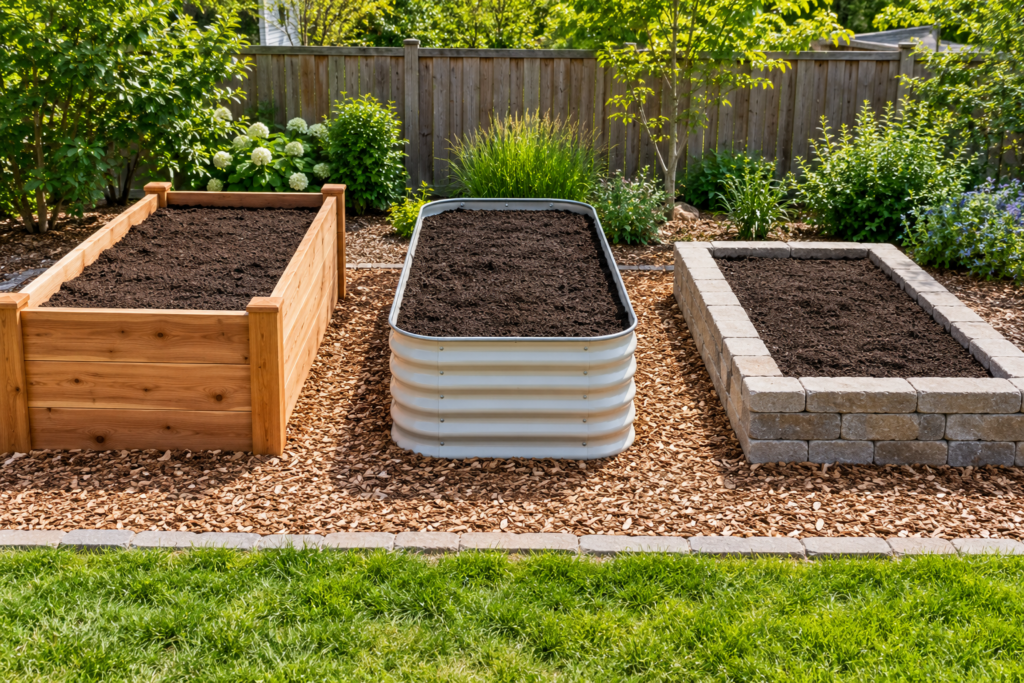
Rot-resistant wood such as cedar, larch, cypress, or redwood is the classic choice. It looks natural, is easy to cut and assemble, and typically lasts ten years or more without treatment. Untreated pine or fir is much cheaper but usually starts to rot within a few years, especially where it touches the soil. Lining the inside of pine boards with heavy plastic sheeting slows decay but also traps moisture against the wood, so results vary.
Modern pressure-treated lumber sold for residential use relies on copper-based preservatives rather than the arsenic-based treatment used in older wood. Many gardeners use it, while others prefer to avoid it entirely for food crops. Old railroad ties and reclaimed wood of unknown origin should never be used, as they may contain creosote or older, far more toxic treatments.
Galvanized or coated steel beds are long-lasting, lightweight, and increasingly popular as kits. They won’t rot and suit modern garden designs. Metal does warm in direct sun, which can dry the soil nearest the edges faster in hot climates, but the mass of soil inside buffers most of that heat. Lighter-colored finishes reflect more sun than dark ones.
Stone, brick, and concrete blocks create permanent, sturdy beds that can last a lifetime. They’re heavier to build with and harder to relocate, but blocks with hollow cores can be filled with soil and planted with herbs or strawberries.
Composite and recycled plastic boards resist rot and insects and need no maintenance. They cost more upfront than most wood and can bow over time in long runs without extra support.
Fabric raised beds are lightweight, inexpensive, and easy to move, making them a good option for renters or for testing a spot before committing to a permanent structure. They typically last a few seasons.
Picking the Best Location
Most fruiting vegetables, including tomatoes, peppers, squash, beans, and cucumbers, need at least six to eight hours of direct sun a day. Leafy greens, peas, and many herbs tolerate less, around four to six hours. Watch your yard for a full day before building, noting where shadows from trees, fences, and the house fall.
Choose level ground if possible, or level the site before installing the frame so water doesn’t run off one end. Keep beds close to a water source, since carrying cans or dragging hoses across the yard quickly becomes a chore in midsummer. If you have the choice, running the long side of a bed north to south gives both sides of the bed more even sunlight through the day.
How to Fill a Raised Bed
The growing mix is the heart of a raised bed, and it’s where many beginners go wrong in one of two directions: filling beds entirely with bagged potting mix, which is expensive and slumps quickly, or filling them with ordinary garden soil, which compacts and drains poorly in a confined space.
A reliable, widely used starting blend is roughly 60 percent good-quality topsoil, 30 percent compost, and 10 percent coarse material such as pine bark fines or perlite for aeration. A simpler 50/50 mix of topsoil and compost also works well for most vegetables. What matters most is that the mix is loose, drains freely, holds moisture, and contains plenty of organic matter.
If you’re buying bulk soil, ask the supplier for a blend labeled for raised beds or vegetable gardens and look at it before delivery if you can. It should be dark, crumbly, and free of large stones, lumps of clay, or visible debris.
What Goes on the Bottom
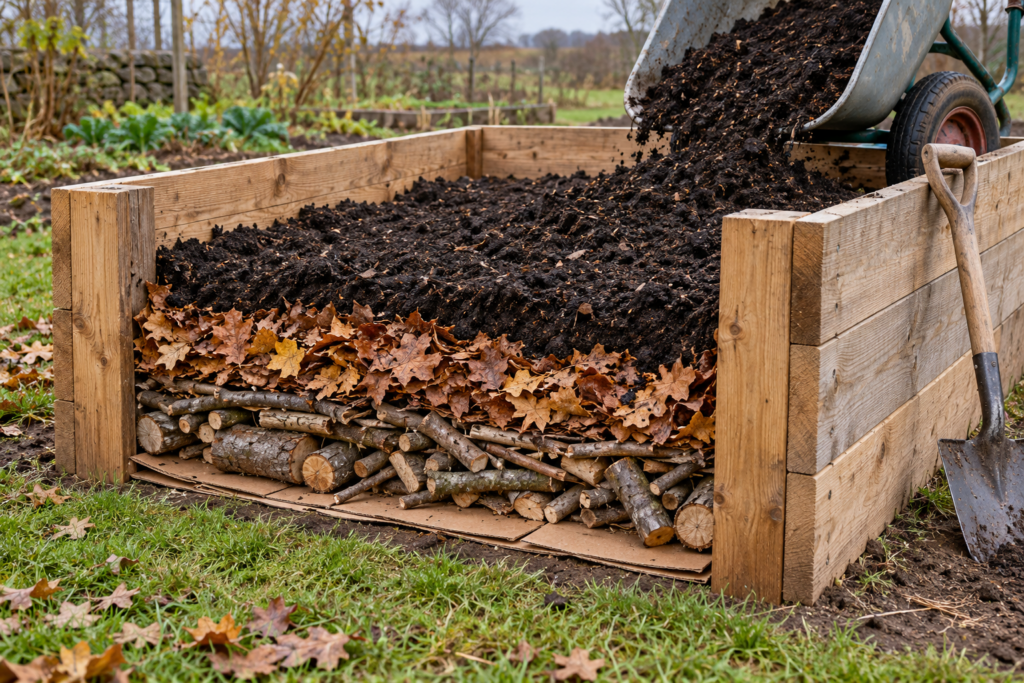
If the bed sits on lawn, lay plain brown cardboard (tape and glossy print removed) directly over the grass inside the frame, overlapping the edges well. It smothers the grass, then breaks down within a season, letting roots and earthworms pass through.
In areas with gophers, moles, or voles, fix galvanized hardware cloth (a stiff wire mesh) across the bottom of the frame before filling. This is far easier to install at the start than to add later.
Avoid lining the bottom with landscape fabric or plastic in most cases. It blocks roots from reaching the soil below, restricts drainage, and prevents earthworms from moving between the ground and the bed.
Working Out How Much Soil You Need
To calculate volume, multiply length by width by depth, all in feet. That gives cubic feet. Divide by 27 to convert to cubic yards, the unit most bulk suppliers use.
For example, a 4 x 8 ft bed filled 1 foot deep holds 32 cubic feet, which is about 1.2 cubic yards. In metric terms, a bed 120 x 240 cm filled 30 cm deep holds about 0.86 cubic meters.
Order roughly 10–20 percent extra. New raised bed soil settles noticeably during the first season as air pockets collapse and organic matter decomposes, and you’ll want material on hand to top it up.
What Is the Cheapest Way to Fill a Raised Bed?
The cheapest way to fill a raised bed is to layer bulky organic materials in the bottom half, such as logs, branches, fallen leaves, grass clippings, and cardboard, then add a top layer of at least 8–12 inches (20–30 cm) of good soil and compost. This cuts purchased soil significantly, especially in tall beds.
This approach draws on two established methods. Hugelkultur uses rotting logs and branches as a base that slowly breaks down and holds moisture like a sponge. Lasagna gardening, also called sheet composting, stacks alternating layers of “brown” material (dry leaves, straw, shredded cardboard) and “green” material (grass clippings, vegetable scraps, fresh plant trimmings).
Expect layered beds to settle more than soil-filled ones, sometimes by several inches in the first year, as the organic material decomposes. Top up with compost each spring. Buying soil in bulk rather than by the bag is also far cheaper once you’re filling more than one or two small beds, and many municipalities offer free or low-cost compost and wood chips.
Planning and Planting Your Beds
Raised beds reward intensive planting. Because the soil is loose, rich, and never walked on, plants can be spaced more closely than in traditional rows, which means more harvest from less space and fewer gaps for weeds to fill.
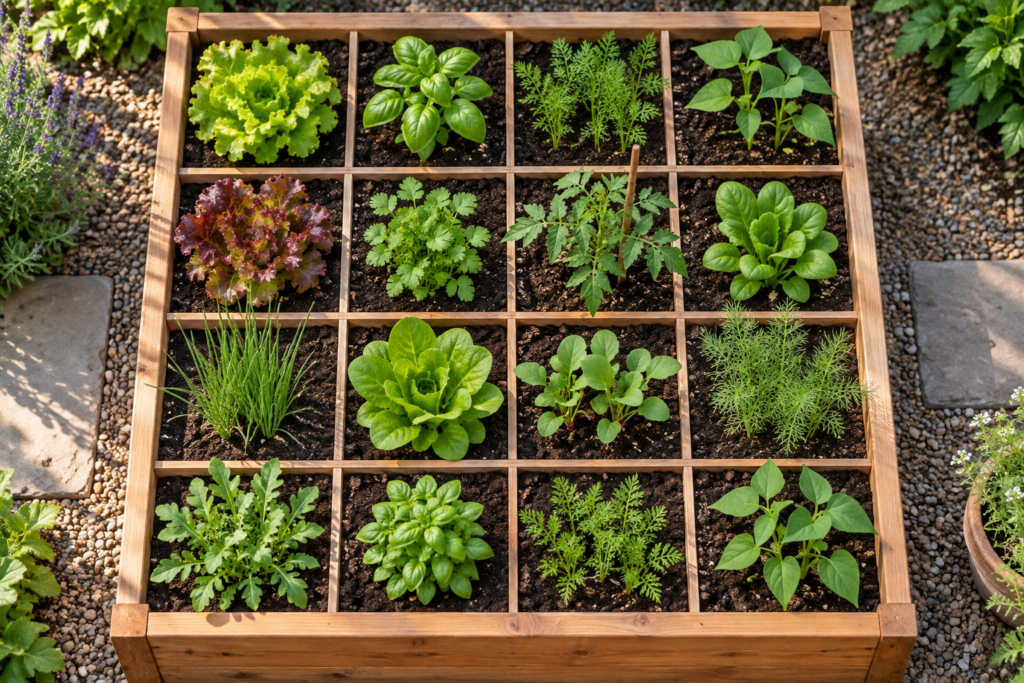
The most popular system for this is square foot gardening, which divides each bed into a grid of 1 x 1 ft (30 x 30 cm) squares. Each square holds a set number of plants depending on their size at maturity:
- 1 per square: tomatoes (staked or caged), peppers, eggplants, broccoli, cabbage, cauliflower
- 4 per square: lettuce, chard, parsley, basil, marigolds
- 9 per square: bush beans, spinach, beets, garlic, onions
- 16 per square: carrots, radishes, scallions
Large, sprawling plants such as zucchini and winter squash often need two to four squares each, or a trellis to grow upward. Many gardeners mark the grid with thin wooden slats or string to make planting quick and tidy.
Positioning Tall and Climbing Crops
Place tall crops like staked tomatoes, pole beans, peas, and trellised cucumbers along the north end of the bed (in the Northern Hemisphere) so they don’t shade shorter plants. A sturdy trellis fixed to the frame or to posts behind it turns vertical space into growing space, which makes a big difference in small gardens.
Interplanting and Succession Sowing
Interplanting pairs fast-growing crops with slower ones in the same space. Radishes sown among carrots mature and are pulled long before the carrots need the room. Lettuce planted around young tomato plants is harvested before the tomatoes grow large enough to shade it out.
Succession sowing keeps beds producing all season. Instead of sowing a whole square of lettuce or radishes at once, sow a small amount every two to three weeks. As soon as one crop finishes, replace it with another: an early spring crop of peas might be followed by summer beans, then a late sowing of spinach or kale for autumn.
What Grows Best in a Raised Bed?
Salad greens, radishes, carrots, beets, bush beans, peppers, tomatoes, onions, garlic, and most culinary herbs grow especially well in raised beds. They thrive in loose, fertile soil and fit neatly into intensive spacing. Root crops benefit most, since stone-free soil produces straighter, cleaner carrots and parsnips.
Strawberries do well too, particularly around the edges of beds where their runners can spill over the sides. Potatoes grow well in deeper beds of 12 inches or more. The crops that suit raised beds least are the large sprawlers, such as pumpkins, winter squash, and watermelons, along with sweet corn, which needs to be planted in a block of many plants for good pollination.
Rotating Crops Between Beds
If you have several beds, rotate crop families each year so the same type of plant doesn’t grow in the same soil repeatedly. This reduces the buildup of soil-borne pests and diseases and balances nutrient use. A simple rotation groups crops into families:
- Nightshades: tomatoes, peppers, eggplants, potatoes
- Brassicas: cabbage, broccoli, kale, cauliflower, radishes
- Legumes: peas and beans
- Alliums: onions, garlic, leeks
- Cucurbits: cucumbers, squash, melons, zucchini
- Roots and leaves: carrots, beets, lettuce, spinach, chard
With three or four beds, move each group along by one bed each year.
Watering, Mulching, and Feeding
Raised beds drain well, which is one of their greatest strengths and also their main maintenance challenge. The same freely draining soil that prevents waterlogging also dries out faster than ground-level soil, particularly in hot or windy weather.
How Often to Water
As a general guide, vegetables need about 1 inch (2.5 cm) of water per week, and more during hot spells or when fruiting crops are carrying a heavy load. In practice, raised beds in midsummer often need watering every day or two, while in cool spring weather once or twice a week may be enough.
Rather than following a fixed schedule, push a finger 2 inches (5 cm) into the soil. If it’s dry at that depth, water deeply until the whole root zone is moist. Deep, less frequent watering encourages roots to grow downward, where the soil stays moist longer. Frequent shallow watering keeps roots near the surface, where they dry out first.
Watering in the morning lets foliage dry during the day, reducing fungal diseases like powdery mildew and leaf spot. Aim the water at the soil rather than the leaves.
Drip Irrigation and Soaker Hoses
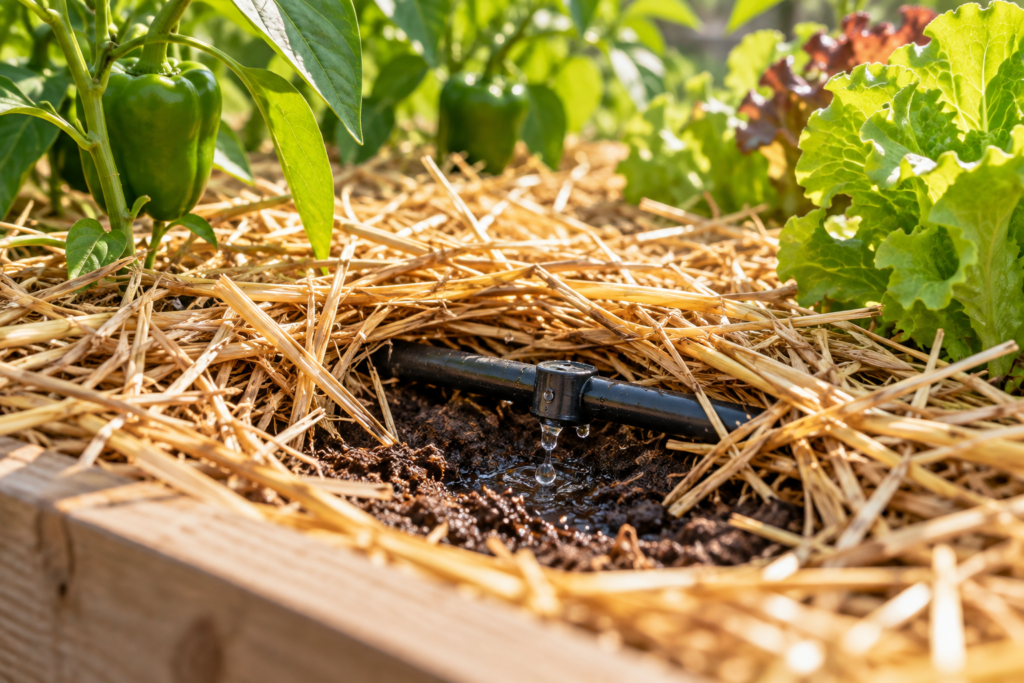
Drip lines or soaker hoses laid across the soil surface deliver water directly to the root zone with very little waste. Connected to an inexpensive battery-powered timer at the tap, they take the daily chore out of watering and keep moisture steady, which prevents problems like tomato blossom end rot and split fruit. For square foot beds, running lines about 12 inches (30 cm) apart covers the whole surface evenly.
Mulching
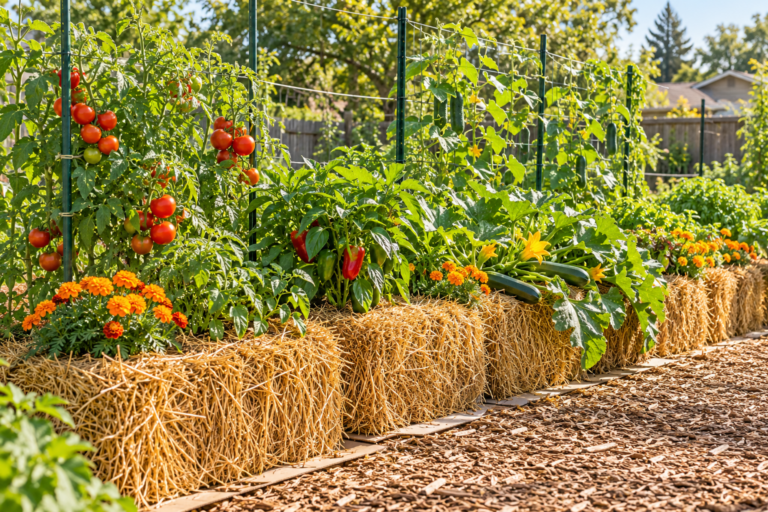
A 2–3 inch (5–8 cm) layer of mulch dramatically reduces moisture loss, suppresses weeds, keeps soil temperatures steady, and adds organic matter as it breaks down. Good options for vegetable beds include straw (make sure it’s seed-free), shredded leaves, grass clippings from untreated lawns, and finely shredded bark. Lay mulch once seedlings are a few inches tall, keeping it slightly back from stems to prevent rot. If you use drip lines, run them beneath the mulch.
Feeding the Soil
Intensively planted raised beds use nutrients quickly. The simplest long-term approach is to add a 1–2 inch (2.5–5 cm) layer of compost to the surface every spring and again in autumn if you can. This replaces organic matter, feeds soil life, and makes up for natural settling.
Heavy feeders such as tomatoes, peppers, squash, cucumbers, and corn benefit from extra nutrition mid-season. A balanced slow-release organic fertilizer worked into the top few inches at planting, followed by a liquid feed every couple of weeks once plants start fruiting, keeps them productive. Leafy greens need less and can become lush but flavorless with too much nitrogen.
A simple soil test every few years tells you whether pH or specific nutrients need correcting, which is more reliable than guessing from plant symptoms.
Caring for Raised Beds Through the Seasons
Raised beds need less heavy labor than traditional gardens, but a little seasonal attention keeps the soil healthy and the frames in good shape for years.
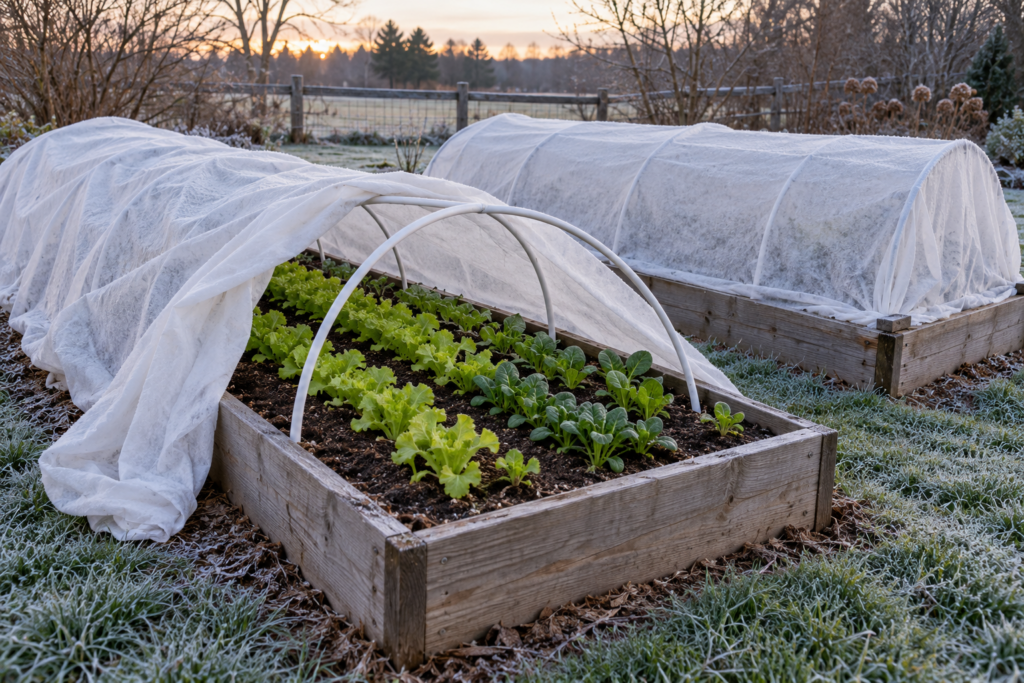
Spring. Top up any settled soil with compost. Loosen the surface gently with a garden fork rather than tilling, which disrupts soil structure and the fungal networks that help plants take up nutrients. Because raised beds warm quickly, they’re ideal for early sowings of peas, spinach, radishes, and lettuce. Hoops made from bent PVC pipe or metal, covered with frost cloth or row cover, protect early plantings from late frosts and can push planting dates earlier still.
Summer. Harvest regularly, since picking beans, zucchini, and herbs often keeps plants producing. Keep up with watering and mulch, pull weeds while they’re small, and check the undersides of leaves for pests. In very hot climates, shade cloth stretched over the same hoops you used in spring protects lettuce and other cool-season crops from bolting.
Autumn. As summer crops finish, pull spent plants (composting healthy ones), then either plant cool-season crops such as kale, garlic, and winter salads, or sow a cover crop. Cover crops like crimson clover, winter rye, or field peas protect bare soil from erosion over winter, add organic matter when cut down in spring, and in the case of legumes, add nitrogen. Alternatively, cover empty beds with a thick blanket of shredded leaves.
Winter. Beds left bare in winter lose soil structure and nutrients to heavy rain, so keep them covered with mulch, a cover crop, or overwintering vegetables. Winter is also the time to check frames for rot, bowing, or loose corners and make repairs before the next growing season.
Keeping Pests Out
Raised beds make several pest controls easier. Hardware cloth under the bed stops burrowing animals. Hoops over the bed can carry fine insect netting, which keeps cabbage worms, flea beetles, and carrot flies off vulnerable crops without any spraying. Bird netting over the same hoops protects strawberries and young seedlings.
Slugs and snails can hide under the lip of a wooden frame. Checking the inside edges of beds with a flashlight on damp evenings, and removing the slugs you find, is one of the more effective controls. Copper tape along the top edge of the frame is popular, though results are mixed.
Common Raised Bed Mistakes
Building beds too wide. A bed you can’t reach into without stepping on it defeats the purpose. If you find yourself leaning on the soil or putting a knee on it, the bed is too wide.
Filling with the wrong mix. Pure garden soil compacts, and pure bagged potting mix slumps and dries out quickly. A blend of topsoil and compost holds up far better.
Underwatering. Many beginners water raised beds on the same schedule as their old in-ground garden and wonder why plants struggle in summer. Check moisture often until you learn how quickly your beds dry.
Leaving too little space for paths. Narrow paths make weeding, harvesting, and moving equipment awkward, and a cramped garden gets visited less often.
Planting one sprawling crop that takes over. A single zucchini or squash plant can cover half a 4 x 8 ft bed by midsummer. Grow them on a trellis, give them their own bed, or choose compact bush varieties.
Ignoring the frame. Long wooden beds without a center brace can bow outward under the weight of wet soil. Adding a cross brace or metal corner brackets during construction prevents problems later.
A well-built raised bed often lasts a decade or more, and the soil inside it gets better every year you add compost and keep it covered. The beds that are hardest work in their first season tend to be the easiest in their fifth, which makes the initial effort one of the better investments a home gardener can make.
Frequently Asked Questions
How long does a wooden raised bed last?
It depends on the wood. Naturally rot-resistant woods such as cedar, redwood, cypress, and larch typically last ten years or longer, while untreated pine or fir often begins to rot within three to seven years. Thicker boards last longer than thin ones, and keeping the wood off constantly wet ground by setting it on a gravel base extends its life.
Can you put a raised bed on concrete or a patio?
Yes, but the bed needs to be deep enough to hold all of the roots, since nothing can grow down into the ground below. Aim for at least 12–18 inches (30–45 cm) of soil and make sure water can drain out at the base, either through small gaps in the frame or a thin layer of gravel beneath the soil. Expect to water more often than in beds on open ground.
Do you need to replace the soil in raised beds every year?
No. Raised bed soil improves over time when you add compost each season. Replacing it is only necessary if a serious soil-borne disease becomes established. Simply top up settled beds with a layer of compost each spring, and rotate crops so the same plant family doesn’t occupy the same bed year after year.
Is pressure-treated wood safe for vegetable raised beds?
Modern pressure-treated lumber for residential use is treated with copper-based preservatives rather than the arsenic-based compounds used in older wood, and many gardeners use it for vegetable beds. Some prefer to avoid it for food crops or line the inside of the boards with plastic sheeting. Never use old treated lumber or railroad ties, since these may contain far more hazardous chemicals.
When is the best time to build a raised bed?
Autumn is often ideal. Building and filling beds in the fall gives the soil and any layered organic material a full winter to settle and begin breaking down, so beds are ready to plant in early spring. Spring construction works too, but leave the filled bed for a week or two and top it up once it settles before planting.
How many raised beds should a beginner start with?
One or two beds of about 4 x 8 ft (120 x 240 cm) is a manageable starting point for most beginners. That’s enough space to grow salad greens, herbs, a few tomato plants, and some beans or root crops without the workload becoming overwhelming. It’s easy to add more beds once you know how much time you realistically have.
Can you grow potatoes in a raised bed?
Yes, and raised beds suit potatoes well because loose, stone-free soil makes harvesting easy and produces cleaner tubers. Choose a bed at least 12 inches (30 cm) deep, plant seed potatoes about 4–6 inches (10–15 cm) down, and mound additional soil or compost around the stems as they grow. Rotate potatoes to a different bed each year, as they share diseases with tomatoes.
Keep Learning
For more beginner help, see How to Start a Garden: The Complete Beginner’s Guide, How to Start a Vegetable Garden: Step-by-Step Guide for Beginners, and Container Gardening: How to Grow Healthy Plants in Pots.

One Comment