
Composting 101: How to Compost for a Healthier Garden
Every week, most households throw away a small mountain of material that gardeners would happily pay for: vegetable peelings, coffee grounds, eggshells, grass clippings, fallen leaves. Sent to the curb, it’s waste. Piled in a corner of the yard for a few months, it turns into dark, crumbly compost, one of the most valuable things…
Every week, most households throw away a small mountain of material that gardeners would happily pay for: vegetable peelings, coffee grounds, eggshells, grass clippings, fallen leaves. Sent to the curb, it’s waste. Piled in a corner of the yard for a few months, it turns into dark, crumbly compost, one of the most valuable things you can put on a garden.
Composting sounds more complicated than it is. At its heart, it’s simply managing natural decay: giving the bacteria, fungi, and small creatures that break down organic matter the food, water, and air they need to work efficiently. Get the basic balance right and a compost pile mostly takes care of itself. Get it wrong and you end up with a smelly, slimy heap or a dry pile that refuses to change for years.
This guide covers composting from the ground up: what compost is and how it helps your garden, what to add and what to leave out, the main bins and methods, how to build and maintain a pile, how to fix common problems, and how to tell when compost is ready and put it to good use.
What Composting Is and Why It Helps Your Garden
Composting is the controlled breakdown of organic material into a stable, soil-like substance called compost, sometimes nicknamed “black gold” by gardeners. The work is done by a huge community of decomposers: bacteria and fungi do most of the chemical breakdown, while earthworms, sowbugs, millipedes, mites, and other small creatures shred and mix the material as they feed.
When conditions are right, these organisms multiply quickly. Their activity generates heat, which is why a well-built compost pile can feel warm or even steam on a cool morning.
How Compost Improves Soil
Compost is one of the most effective soil amendments available, and it benefits almost every type of soil:
- Improves structure. In clay, compost helps bind fine particles into crumbs, improving drainage and letting roots penetrate. In sandy soil, it acts like a sponge, holding water and nutrients.
- Supplies nutrients slowly. Compost contains a broad range of nutrients, released gradually as soil organisms continue to break it down.
- Feeds soil life. Compost is packed with beneficial microbes and provides food for earthworms and other soil organisms that keep soil healthy.
- Holds moisture. Soils rich in organic matter hold more water, reducing how often you need to water.
- Helps buffer pH. Compost helps moderate swings in soil acidity and alkalinity.
- Supports plant health. Healthy, biologically active soil can help some plants resist certain soil-borne diseases.
Environmental Benefits
Food scraps and yard waste make up a significant share of household trash. When organic material is buried in landfills, it breaks down without air and produces methane, a potent greenhouse gas. Composting at home turns that material into a useful resource, reduces the amount of waste collected, and cuts down on the need for bagged soil amendments.
How Long Does It Take to Make Compost?
Compost can be ready in as little as one to three months with an actively managed hot pile that’s turned regularly, or it can take six months to two years in a cold pile that’s left mostly alone. Temperature, moisture, particle size, the balance of materials, and how often the pile is turned all affect the speed.
What to Compost: Greens, Browns, and What to Leave Out
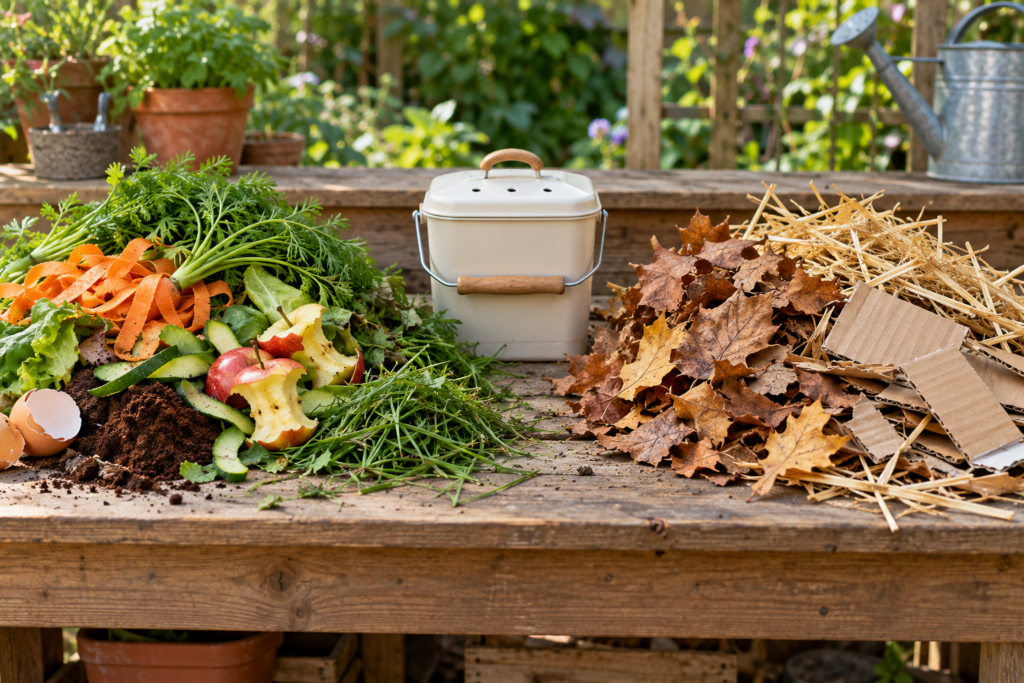
A healthy compost pile needs a mix of two types of material, commonly called “greens” and “browns.” The names describe their role more than their color.
Greens: Nitrogen-Rich Materials
Greens are moist, fresh materials rich in nitrogen. They provide protein for decomposing microbes and heat up a pile quickly.
- Fruit and vegetable scraps and peelings
- Coffee grounds and paper coffee filters
- Tea leaves and tea bags (some tea bags contain plastic, so check or tear them open)
- Fresh grass clippings from untreated lawns
- Fresh plant trimmings and spent garden plants without disease
- Manure from herbivores such as cows, horses, chickens, and rabbits
- Fresh weeds without seeds
Browns: Carbon-Rich Materials
Browns are dry, carbon-rich materials. They provide energy for decomposers, absorb excess moisture, and create air pockets in the pile.
- Dry leaves (ideally shredded)
- Straw
- Shredded plain cardboard and newspaper
- Paper towels, napkins, and paper bags without chemical cleaners
- Cardboard egg cartons and toilet paper tubes
- Sawdust and wood shavings from untreated wood
- Small twigs and woody prunings, chopped
- Pine needles, in moderation
- Dryer lint from natural fibers
- Nutshells
Getting the Balance Right
Decomposers work best when they have roughly 25 to 30 parts carbon for every part nitrogen. You don’t need to calculate this exactly. A simple rule of thumb is to add about two to three parts browns to one part greens by volume.
The balance tells you a lot about how a pile will behave. Too many greens and the pile becomes wet, slimy, and smelly. Too many browns and it stays dry and barely breaks down. Keeping a bag or bin of dry leaves or shredded cardboard next to the compost makes it easy to cover each fresh addition of kitchen scraps with a layer of browns.
What Not to Compost
Some materials cause odors, attract pests, spread disease, or contain chemicals that don’t belong in the garden.
- Meat, fish, bones, and dairy products. These attract rodents, raccoons, and flies and create strong odors in home compost piles. Bokashi fermentation, described below, is one of the few home methods suited to them.
- Oils, fats, and greasy foods. They slow decomposition and attract pests.
- Pet waste from cats and dogs. It can carry parasites and pathogens that aren’t reliably killed in home piles.
- Diseased plants. Home piles often don’t get hot enough to kill plant diseases.
- Weeds with mature seeds or spreading roots, such as bindweed and invasive grasses. Unless your pile gets very hot, they may survive and spread.
- Grass clippings treated with herbicides. Some herbicides persist through composting and can harm vegetables.
- Sawdust or chips from treated or painted wood.
- Coal ash and charcoal briquette ash.
- Glossy, coated, or heavily printed paper.
- “Compostable” plastics. Many are designed for industrial composting facilities and won’t break down in a home pile.
Small amounts of wood ash from untreated wood can be added occasionally, but it’s alkaline, so use it sparingly.
Can You Compost Citrus and Onions?
Yes, citrus peels and onion scraps can go into an outdoor compost pile. They break down more slowly than most kitchen scraps, so chopping them helps. In worm bins, it’s best to limit or avoid them, since composting worms tend to dislike their acidity and strong compounds, and large amounts can make a worm bin inhospitable.
Choosing a Compost Bin or Method
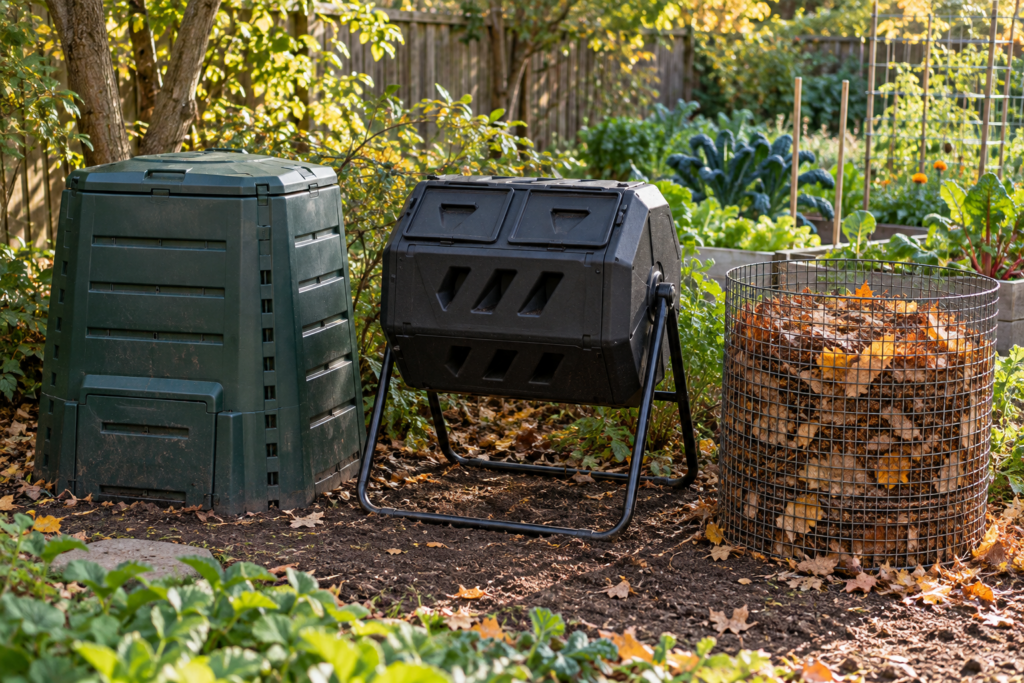
There’s no single best way to compost. The right method depends on your space, the materials you have, how quickly you want finished compost, and how much time you want to spend.
Open Piles
The simplest method is a free-standing pile in a corner of the yard. It costs nothing and can handle large amounts of garden waste. Open piles can look untidy, may attract animals if food scraps aren’t buried, and dry out or get soaked depending on the weather.
Wire and Wooden Bins
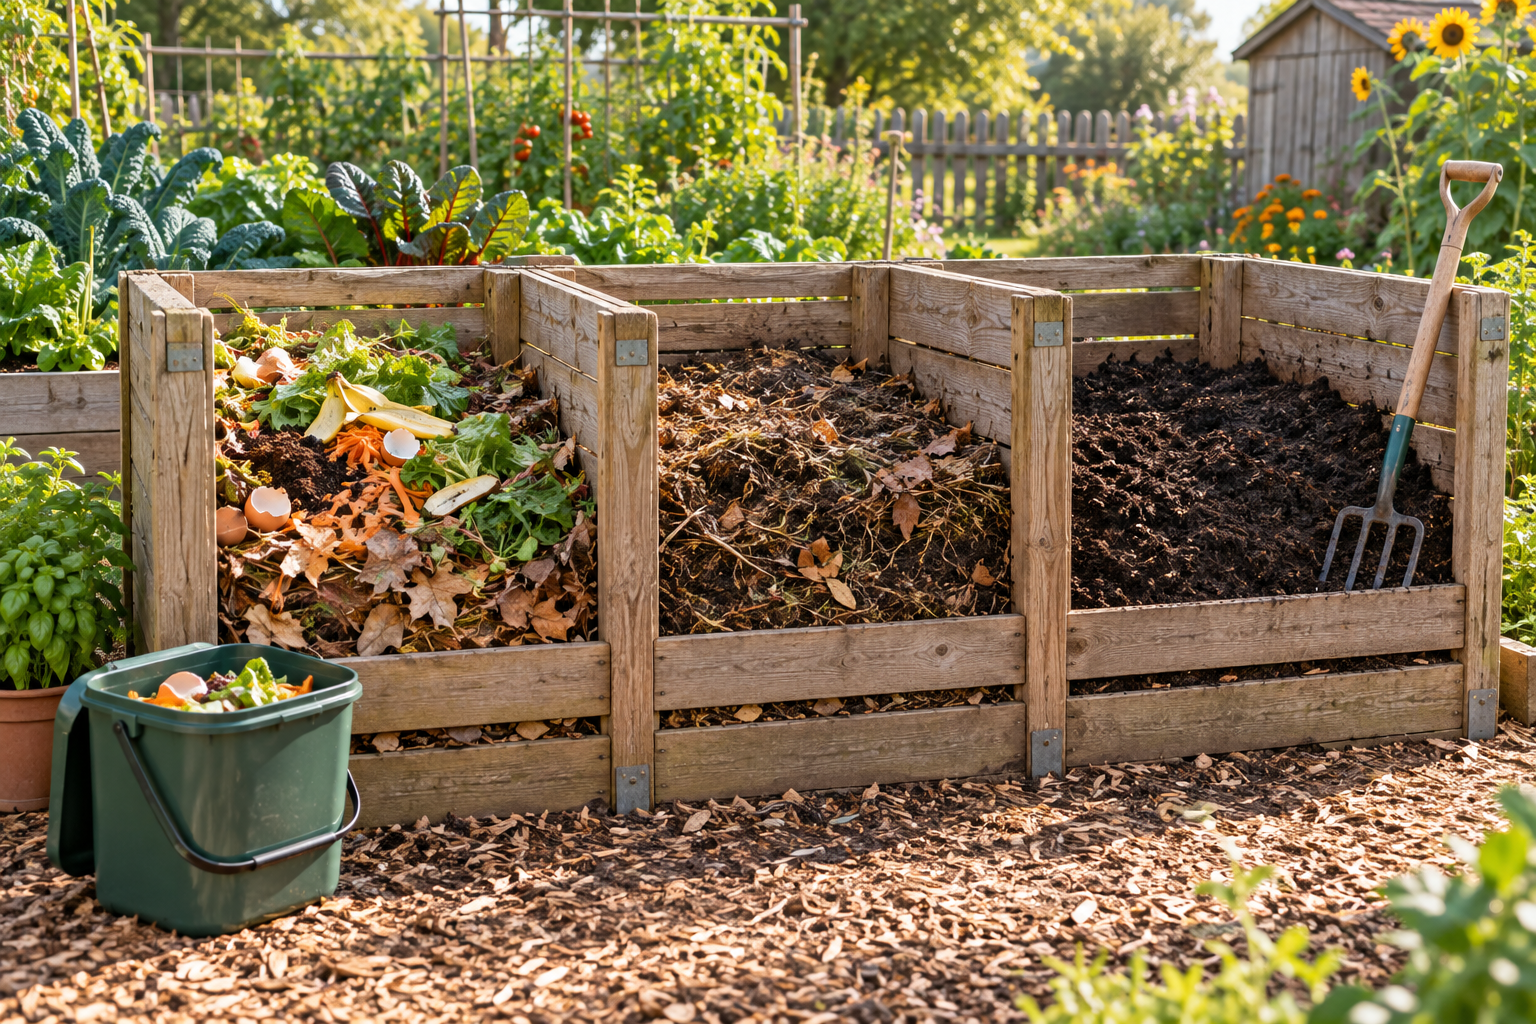
Enclosures made from wire mesh, wooden pallets, or slatted boards keep a pile neat and contained while allowing airflow. A wire cylinder is ideal for collecting autumn leaves. A three-bay wooden bin lets you manage compost in stages: fresh material goes in the first bay, partly finished compost moves to the second, and finished compost cures in the third.
Enclosed Plastic Bins
Enclosed bins with lids suit smaller gardens and urban yards. They hold heat and moisture well, keep out rain, and discourage most animals. Many have a door near the base for removing finished compost. They’re typically added to continuously, so compost at the bottom finishes while fresh material goes on top.
Compost Tumblers
Tumblers are enclosed drums mounted on a frame so they can be rotated. They make turning easy, keep out pests, and can produce compost relatively quickly when well managed. Their capacity is limited, and they work best when filled in batches rather than added to constantly, so many gardeners use two.
Worm Bins
Worm composting, or vermicomposting, uses composting worms, usually red wigglers, to convert kitchen scraps into nutrient-rich worm castings. Worm bins are compact and can be kept in a garage, basement, or shaded porch, making them a good choice for apartments and small spaces. They handle kitchen scraps well but not large volumes of yard waste. Ordinary garden earthworms aren’t suited to worm bins.
Bokashi
Bokashi is a fermentation method that uses bran inoculated with beneficial microbes. Food scraps, including small amounts of meat and dairy, are layered with bran in an airtight bucket and left to ferment for a couple of weeks. The fermented material isn’t finished compost; it’s then buried in the garden or added to a compost pile, where it breaks down quickly.
Trench and Pit Composting
The simplest method of all is to dig a trench or hole about a foot (30 cm) deep in an empty bed, add kitchen scraps, and cover them with soil. Soil organisms break the material down in place over several months. It’s a good way to improve a bed you plan to plant later in the season.
Choosing a Bin for Beginners
For most beginners, an enclosed plastic bin or a simple wooden or wire bin is the easiest place to start. Both are inexpensive, low-maintenance, and forgiving of mistakes. Tumblers suit gardeners who want to avoid turning with a fork, while worm bins suit apartment dwellers and those composting mainly kitchen scraps.
Where to Put Your Compost
- On bare soil rather than concrete, so worms and soil organisms can move in.
- In partial shade, where the pile won’t dry out quickly in summer or become waterlogged in winter.
- On level, well-drained ground.
- Close to the kitchen and the garden, so adding scraps and using compost are convenient.
- Away from property lines and windows, out of courtesy to neighbors.
For a hot compost pile, aim for a minimum size of about 3 x 3 x 3 feet (roughly 1 x 1 x 1 m). Smaller piles struggle to hold heat, while piles much larger than about 5 feet (1.5 m) on each side can become compacted and airless in the middle.
How to Build and Maintain a Compost Pile
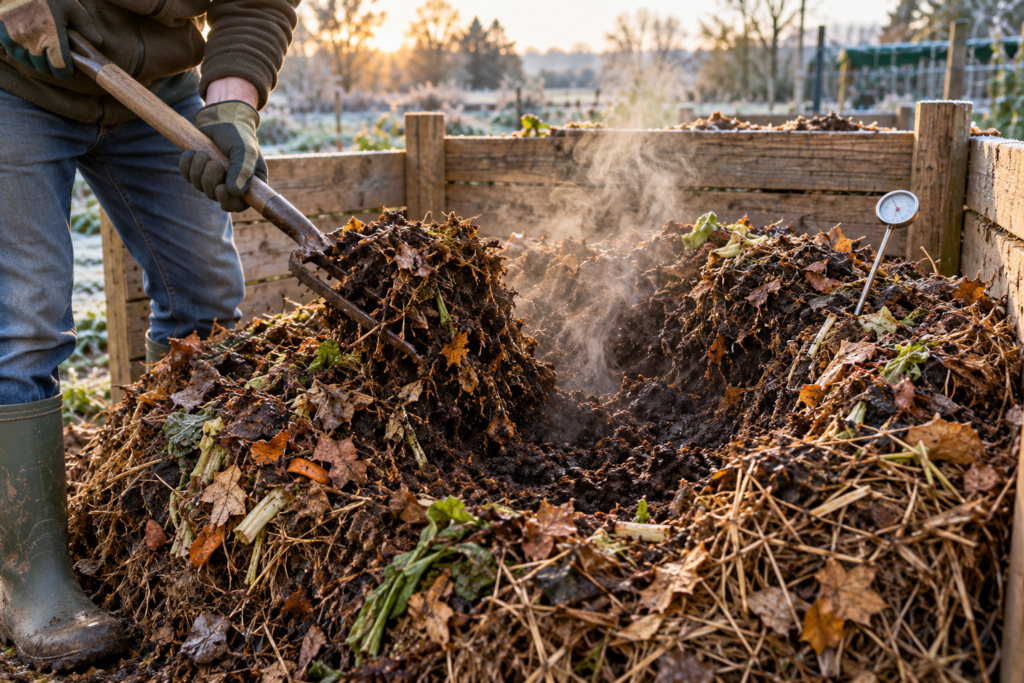
A well-built pile breaks down faster, smells better, and needs less attention.
Building the Pile
- Start with a coarse base. A layer of twigs, small branches, or straw at the bottom improves drainage and airflow.
- Alternate greens and browns. Add layers or mix materials so greens are always balanced by browns. Cover each addition of kitchen scraps with browns to reduce odors and fruit flies.
- Chop large materials. Smaller pieces break down much faster. Shred leaves with a mower, cut up woody stems, and break up large vegetable scraps.
- Add moisture. The pile should feel like a wrung-out sponge: damp throughout but not dripping. Water dry materials as you add them.
- Add a little soil or finished compost. A shovelful introduces decomposing organisms, though most materials already carry plenty.
Hot Composting vs Cold Composting
Hot composting involves building a large pile all at once with a good balance of greens and browns, keeping it moist, and turning it often. Decomposers work rapidly, raising the temperature in the center to around 130–160°F (55–70°C). A pile that holds 131°F (55°C) or higher for several days, and is turned so that all the material spends time in the hot center, kills most weed seeds and plant pathogens. Hot compost can be ready within one to three months.
Cold composting means adding materials gradually as they become available and letting the pile sit with little turning. It takes much longer, often six months to two years, and doesn’t reliably kill weed seeds or diseases, but it requires almost no effort. Many home gardeners compost this way.
A compost thermometer, with a long probe pushed into the center of the pile, shows how actively it’s working.
How Often Should You Turn Compost?
For hot composting, turn the pile every one to two weeks, or whenever the center temperature starts to drop. Turning adds oxygen, redistributes moisture, and moves cooler outer material into the hot center. For cold composting, turning every month or two speeds things up, though it’s optional. Tumblers can be rotated a few times each week.
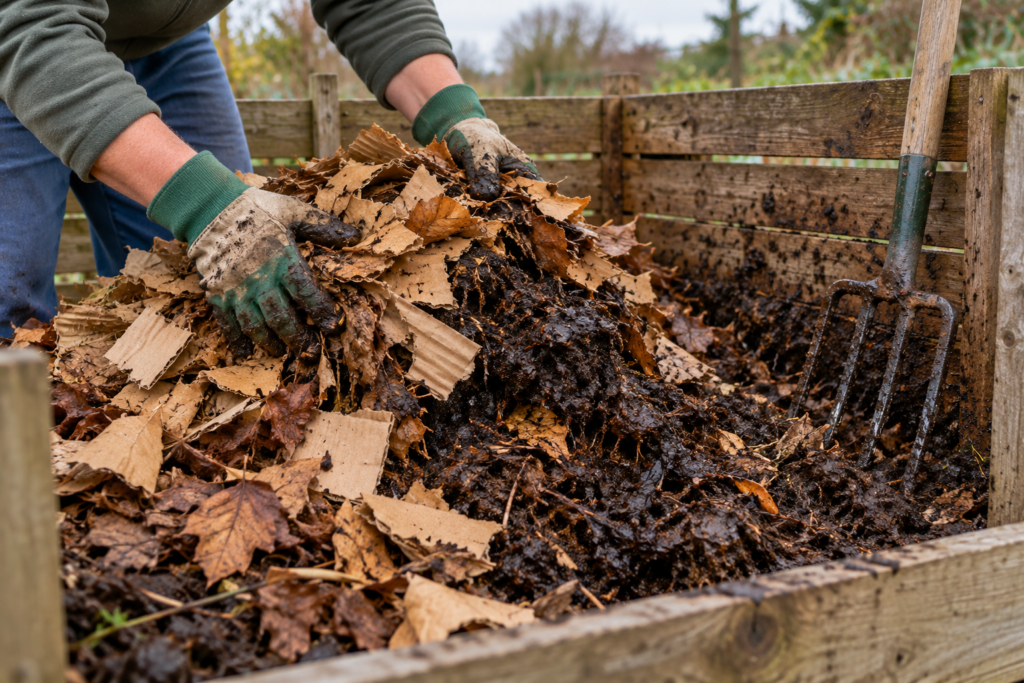
To turn a pile, use a garden fork to move material from the outside of the pile to the center and from the top to the bottom. If you have a multi-bay bin, simply fork the pile from one bay into the next. Check moisture as you go, adding water to dry spots and browns to wet ones.
Keep a Stockpile of Browns
Kitchen scraps and grass clippings arrive all year, but browns are often abundant only in autumn. Collect and store bags of dry leaves each autumn, and save shredded cardboard and paper, so you always have browns to balance the greens.
Collecting Kitchen Scraps
A small lidded caddy or container on the kitchen counter or under the sink makes collecting scraps easy. Empty it every few days to avoid odors. Lining it with newspaper or keeping it in the freezer between trips to the pile reduces smells and fruit flies.
Troubleshooting Common Compost Problems
Most compost problems come down to an imbalance in moisture, air, or the mix of greens and browns. Fortunately, they’re usually easy to fix.
Why Does My Compost Smell Bad?
A bad-smelling compost pile is almost always too wet, too compacted, or overloaded with greens. A sour or rotten-egg smell means the pile lacks oxygen; turn it and mix in dry browns like shredded cardboard or leaves. An ammonia smell means too much nitrogen; add more browns. A healthy pile smells earthy, like a forest floor.
The Pile Isn’t Heating Up or Breaking Down
- Too dry: add water while turning until the material feels like a wrung-out sponge.
- Too many browns: mix in fresh greens such as grass clippings, vegetable scraps, or manure.
- Too small: build a larger pile, ideally at least 3 feet (1 m) on each side.
- Pieces too large: chop or shred materials.
- Cold weather: decomposition naturally slows in winter and resumes when temperatures rise.
The Pile Is Soggy and Slimy
Too much water or too many greens create a wet, dense, airless pile. Mix in plenty of dry browns, turn the pile to add air, and cover it with a lid or tarp to keep off heavy rain.
The Pile Is Dry and Dusty
Water the pile as you turn it, and add fresh greens. In dry climates and hot weather, a lid or cover helps retain moisture, and placing the pile in shade reduces drying.
Rodents and Other Animals
Rats, mice, raccoons, and other animals are attracted to food scraps. To discourage them:
- Never add meat, fish, dairy, oils, or cooked foods to an open pile.
- Bury kitchen scraps in the center of the pile and cover them with browns.
- Use an enclosed bin with a lid.
- Line the base of bins with galvanized hardware cloth to stop animals burrowing in from below.
- Keep the pile moist and turn it regularly, since rodents prefer dry, undisturbed piles.
Fruit Flies and Other Insects
Fruit flies gather around exposed food scraps. Covering scraps with a layer of browns or soil usually solves the problem. Many insects in a compost pile, including sowbugs, beetles, and worms, are beneficial decomposers. Black soldier fly larvae, which look like large maggots, are harmless and very efficient at breaking down food scraps. Ants often indicate a pile that’s too dry.
Seeds Sprouting in Compost
Tomato, squash, and melon seeds often survive cold composting and sprout when compost is spread in the garden. Hot composting kills most seeds. Otherwise, simply pull unwanted seedlings, or let a few grow if you’re curious about the result.
Composting in Winter
Decomposition slows dramatically in cold weather but doesn’t completely stop, especially in the center of large piles. Keep adding scraps and browns through winter, and the pile will resume active decomposition in spring. Insulating the bin with straw bales or bags of leaves helps retain heat.
When Compost Is Ready and How to Use It
Finished compost is the reward for all your effort. Knowing when it’s ready and how to use it ensures you get the full benefit.
Signs That Compost Is Finished
Finished compost:
- Is dark brown to black in color.
- Has a crumbly, soil-like texture.
- Smells pleasantly earthy, not sour or rotten.
- Contains few or no recognizable pieces of the original materials, apart from occasional woody bits.
- Has cooled to near the surrounding air temperature.
Let It Cure
After compost appears finished, letting it sit for a few more weeks, a process called curing, allows decomposition to finish and the compost to stabilize. Cured compost is gentler on young plants and seedlings.
Sifting Compost
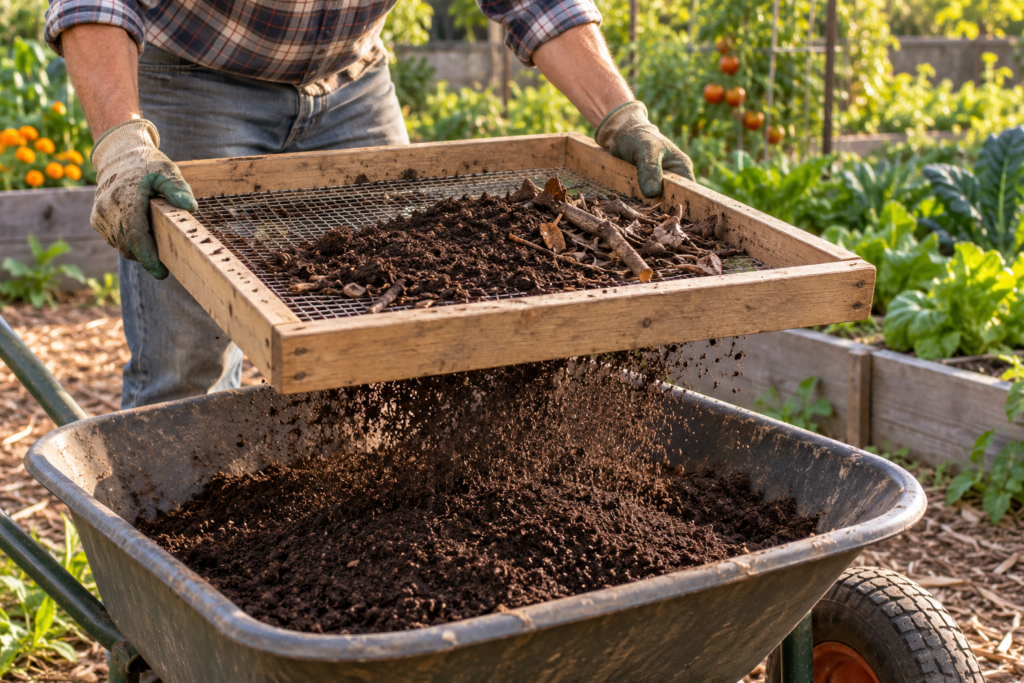
For a finer texture, sift compost through a screen with openings of about half an inch (1.25 cm), made from hardware cloth attached to a wooden frame. Return larger pieces to the pile to continue breaking down. Sifted compost is ideal for seed-starting mixes, potting mixes, and top-dressing lawns.
Ways to Use Compost
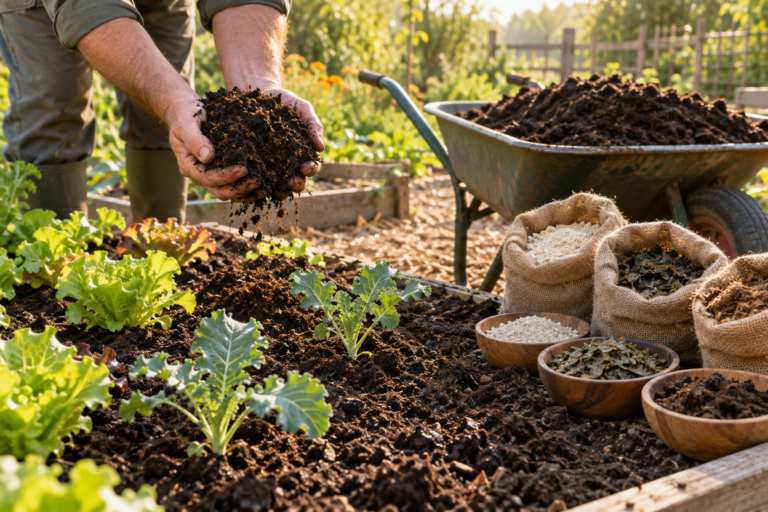
Improving garden beds. Spread 1–3 inches (2.5–8 cm) of compost over vegetable and annual flower beds each year, and lightly work it into the top few inches or leave it on the surface for worms to incorporate.
Top-dressing perennials and shrubs. Spread a thin layer around the base of perennials, shrubs, and trees each spring or autumn, keeping it slightly away from stems and trunks.
Planting holes. Mix a few handfuls of compost into the soil used to backfill planting holes for transplants, perennials, and shrubs.
Potting mix. Blend compost into potting mix for containers, typically making up about a quarter to a third of the mix. Using compost alone in pots is too dense and rich.
Lawns. Spread a thin layer of sifted compost, about a quarter to half an inch (6–12 mm), over lawns in spring or autumn, ideally after aerating. It improves soil and encourages healthy growth.
Mulch. Use coarse or partly finished compost as a mulch around shrubs and trees.
Seed starting. Mix sifted, well-cured compost with other seed-starting ingredients such as coir, peat, or vermiculite. Pure compost is too rich and dense for most seeds.
Common Composting Mistakes
Adding too many greens at once. Large amounts of grass clippings or kitchen scraps without browns create a smelly, slimy pile.
Letting the pile dry out. Dry compost stops breaking down. Keep it evenly moist.
Never turning the pile. Turning isn’t essential, but it greatly speeds up decomposition and prevents odors.
Building a pile too small. Small piles struggle to heat up. Aim for at least 3 feet (1 m) on each side for hot composting.
Adding the wrong materials. Meat, dairy, pet waste, and diseased plants cause problems in home piles.
Using unfinished compost around seedlings. Partly decomposed material can tie up nutrients and harm young plants.
Expecting instant results. Composting takes time. Patience and a good balance of materials are the keys to success.
Start small, keep a steady supply of browns on hand, and let the pile do most of the work. Within a season or two, you’ll have your own supply of rich compost and a garden that shows the difference.
Frequently Asked Questions
Can you compost in winter?
Yes. Decomposition slows in cold weather, but you can keep adding kitchen scraps and browns all winter. Large piles and insulated bins retain some warmth in their centers and continue working slowly. Material that freezes will break down quickly once temperatures rise in spring, so a winter-built pile often heats up rapidly when the weather warms.
Can you compost in an apartment?
Yes. Worm bins work well indoors or on balconies and handle kitchen scraps with little odor when managed properly. Bokashi buckets are compact and can process small amounts of meat and dairy. Many cities also offer food scrap collection programs or community compost drop-off sites, which are useful if you don’t have space for a garden.
Do I need a compost starter or activator?
No. Compost starters and activators aren’t necessary for most home piles. Garden soil, finished compost, manure, and fresh greens already contain plenty of decomposing microbes. A shovelful of soil or finished compost mixed into a new pile is enough to introduce them. Getting the moisture and the balance of greens and browns right matters far more.
Is compost the same as fertilizer?
Not exactly. Compost is primarily a soil amendment: it improves soil structure, water retention, and biological activity while providing a modest, slow-release supply of nutrients. Fertilizers are designed mainly to supply specific nutrients in higher concentrations. Many gardens with compost-rich soil need little fertilizer, though heavy-feeding crops and containers may still benefit from additional feeding.
Can you compost bread, pasta, and rice?
Bread, pasta, rice, and other cooked grains will decompose, but they attract rodents and other animals and can become moldy and smelly. If you add them, use small amounts, bury them deep in the center of an enclosed, active pile, and cover them well with browns. Bokashi buckets handle these foods more easily.
Should a compost pile be covered?
Covering a compost pile with a lid, tarp, or layer of straw helps keep moisture levels steady, preventing the pile from drying out in summer or becoming waterlogged in heavy rain. It also helps retain heat and discourages animals. Make sure the cover still allows some airflow, and check moisture regularly.
Can you use compost before it’s fully finished?
Partly finished compost can be used as a mulch on the surface around established shrubs, trees, and perennials, where it will continue breaking down. Avoid mixing unfinished compost into planting holes, seed beds, or potting mixes, since active decomposition can temporarily tie up nitrogen and may harm seedlings and young roots.
Keep Learning
For more beginner help, see How to Start a Garden: The Complete Beginner’s Guide, How to Start a Vegetable Garden: Step-by-Step Guide for Beginners, and Native Plant Gardening: Why and How to Grow Native Plants.

One Comment