Cold Frame Gardening: How to Extend Your Growing Season
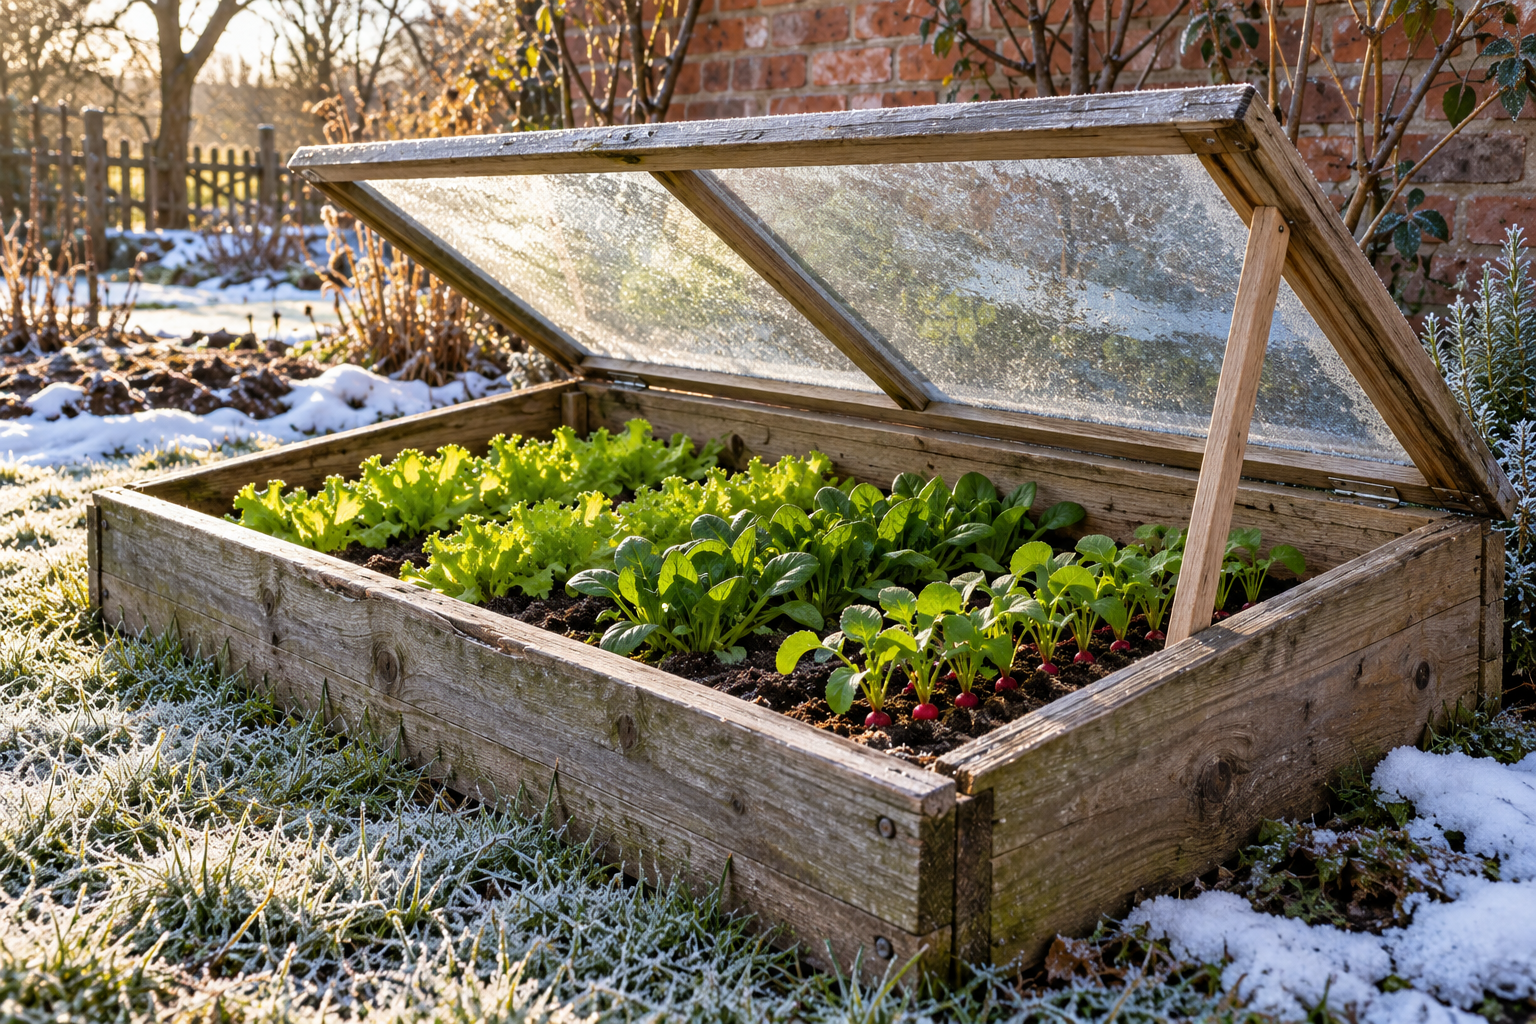
There’s a particular pleasure in lifting a lid on a frosty February morning and finding fresh spinach underneath. Outside, the garden is bare and brown. Inside a simple box with a glass top, the leaves are green, crisp, and ready to pick. That small contrast is the whole appeal of a cold frame. A cold…
There’s a particular pleasure in lifting a lid on a frosty February morning and finding fresh spinach underneath. Outside, the garden is bare and brown. Inside a simple box with a glass top, the leaves are green, crisp, and ready to pick. That small contrast is the whole appeal of a cold frame.
A cold frame is one of the oldest and least expensive ways to stretch the gardening year. It needs no electricity, takes an afternoon to build from scrap materials, and fits into a corner of almost any garden. Used well, it lets you sow salads weeks before the ground outside is ready, harden off seedlings without the daily shuffle of trays in and out of the house, and keep harvesting hardy greens long after the first autumn frosts.
This guide explains how cold frames work, how to choose or build one and where to place it, how to manage temperature and ventilation, what to grow through each season, how to use a frame for seedlings and hardening off, and how to look after it so it stays productive for years.
What a Cold Frame Is and How It Works
A cold frame is a bottomless box with a transparent lid, set directly on the soil. Sunlight passes through the lid and warms the soil and air inside. The box traps that warmth, blocks cold wind, and protects plants from heavy rain, frost, and snow. It’s called “cold” because it has no heat source other than the sun, which separates it from a heated greenhouse or a hotbed.
Think of it as a miniature, unheated greenhouse that sits at ground level. Because the space inside is small and close to the soil, it holds on to the ground’s stored warmth overnight, creating a sheltered microclimate that’s noticeably milder than the open garden.
How Much Warmer Is a Cold Frame Than Outside?
A cold frame typically stays around 5–10°F (3–6°C) warmer than the outside air on cold nights, and considerably warmer on sunny days. The exact difference depends on the frame’s construction, insulation, and how much solar heat the soil stored during the day. Extra covers at night can add several more degrees of protection.
That modest difference makes a big impact in the garden. It can protect hardy and half-hardy crops from frost, keep soil workable when the ground outside is frozen, and extend the growing season by several weeks at both ends of the year. In mild-winter climates, a cold frame can support salad crops right through winter.
What a Cold Frame Is Used For
Gardeners use cold frames for several distinct jobs:
- Starting crops early by sowing cool-season vegetables directly into the frame weeks before they could be sown outside.
- Hardening off seedlings raised indoors, so they adjust gradually to outdoor conditions before planting out.
- Extending autumn harvests by protecting late crops from the first frosts.
- Growing winter salads such as spinach, lettuce, corn salad, and hardy Asian greens.
- Overwintering plants such as potted perennials, cuttings, and borderline-hardy plants that need shelter from the worst of the cold and wet.
Cold Frames vs Other Season Extenders
A greenhouse is a walk-in structure that holds more plants and can be heated, but costs far more. Cloches are small individual covers, such as glass bells or cut plastic bottles, placed over single plants. Row covers are lightweight fabric draped over crops or hoops, offering a few degrees of frost protection. A hotbed is a cold frame with added heat from below, traditionally from decomposing manure and now often from an electric heating cable. A cold frame sits between these options: sturdier and warmer than a cloche or row cover, much cheaper and smaller than a greenhouse.
Choosing or Building a Cold Frame
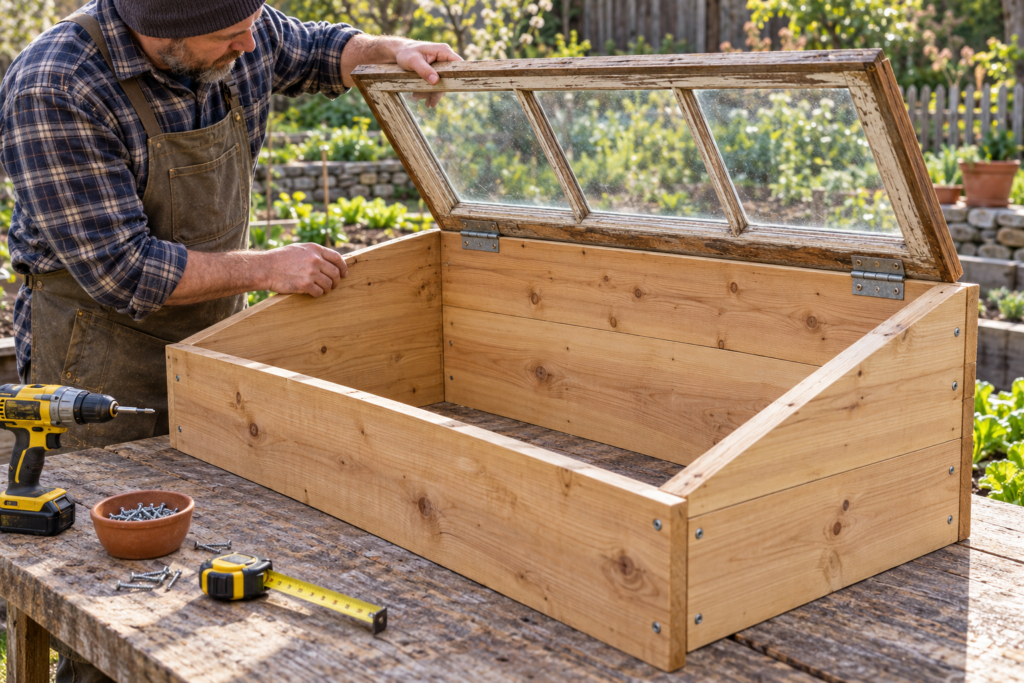
Cold frames range from simple homemade boxes to ready-made kits with automatic vents. The basic design is the same: four sides, a sloping transparent lid, and an open bottom.
Key Design Features
A sloping lid. The back wall should be taller than the front, so the lid slopes toward the sun. This captures more light, especially in winter when the sun is low, and lets rain and melting snow run off. A common design has a back wall around 18 inches (45 cm) high and a front wall around 12 inches (30 cm), though proportions vary.
Manageable size. Keep the frame no deeper from front to back than you can comfortably reach, usually around 3 feet (90 cm). Length is flexible; frames of 3–6 feet (90–180 cm) are common. Larger frames can be split into sections with separate lids.
Solid sides. Opaque sides of wood, brick, or insulated panels hold heat better than clear sides, though clear sides let in more light. Many gardeners choose solid sides with a clear lid as a good compromise. Painting the inside walls white helps reflect light back onto plants.
A secure lid. The lid should seal reasonably well when closed, open easily, and stay put in wind. A hinge along the back edge and a notched prop stick or adjustable support for venting are standard.
Choosing a Lid Material
- Glass transmits the most light and lasts indefinitely if it isn’t broken. It’s heavy and can shatter, which is a concern around children and pets.
- Twin-wall polycarbonate is lightweight, shatter-resistant, and insulates better than single glass thanks to its air pocket. It diffuses light slightly and is the most popular material for modern frames.
- Acrylic sheet is lighter than glass and clearer than polycarbonate, though it can scratch and become brittle over time.
- Polyethylene film stretched over a wooden frame is the cheapest option and suits temporary frames, though it needs replacing every season or two.
Old windows are a classic, free source of cold frame lids. Be cautious with windows from older houses, since many older window frames were painted with lead-based paint. Test the paint, avoid chipped or flaking frames, or seal them thoroughly before using them near edible crops.
Types of Cold Frames
Wooden frames built from rot-resistant boards are the most common homemade design and blend well into vegetable gardens.
Permanent frames built from brick, stone, or concrete blocks hold heat well and last for decades, making them ideal where a frame will stay in one spot.
Straw bale frames use bales arranged in a rectangle with an old window or polycarbonate sheet laid on top. They insulate remarkably well and can be broken down into mulch or compost afterward.
Kit frames of aluminum and polycarbonate are lightweight, easy to assemble, and often come with automatic vent openers.
Portable frames light enough to lift and move can be placed over different beds as the season progresses, protecting early crops in one spot and late crops in another.
Raised bed lids turn an existing raised bed into a cold frame by adding a hinged, transparent top.
Which Direction Should a Cold Frame Face?
A cold frame should face south in the Northern Hemisphere (north in the Southern Hemisphere), with the lid sloping toward the sun. This orientation catches the most light and warmth during winter and early spring, when the sun is low. A spot sheltered from cold winds, such as against a sunny wall, adds further warmth.
Choose a location with full winter sun, since shade from buildings, fences, and evergreen trees becomes much longer when the sun sits low. Good drainage is essential, as waterlogged soil stays cold and invites rot. A site close to the house makes it easier to check and vent the frame daily in changeable weather.
Building a Simple Wooden Cold Frame
A basic frame takes only a few materials and tools:
- Cut the back and front boards to the chosen length, with the back taller than the front.
- Cut the two side boards on an angle so they slope from the back height down to the front height.
- Screw the sides to the front and back using corner blocks or brackets for strength.
- Attach the lid to the back wall with two or more exterior hinges.
- Add a handle on the front edge of the lid and a prop stick with notches for different venting heights.
- Set the frame on level ground, pressing it slightly into the soil or banking soil around the outside to seal gaps.
Sinking the frame a few inches into the ground, or banking soil or straw around its outside walls, improves insulation significantly.
Managing Temperature and Ventilation
The most common cold frame mistake isn’t letting plants freeze. It’s letting them cook. A closed frame on a bright day, even in the middle of winter, can heat up quickly enough to scorch leaves and wilt seedlings within an hour or two.
When Should You Open a Cold Frame?
Open a cold frame whenever the sun is shining and outdoor temperatures are above freezing, propping the lid a few inches to let excess heat escape. On warm, sunny days, open it wider or remove the lid entirely. Close it by mid-afternoon to trap the day’s warmth before temperatures drop in the evening.
For most cool-season crops, aim to keep the daytime temperature inside the frame roughly between 50°F and 70°F (10–21°C). Above this range, lettuce and spinach can wilt, bolt, or develop leaf scorch. Below it, growth slows but hardy crops survive.
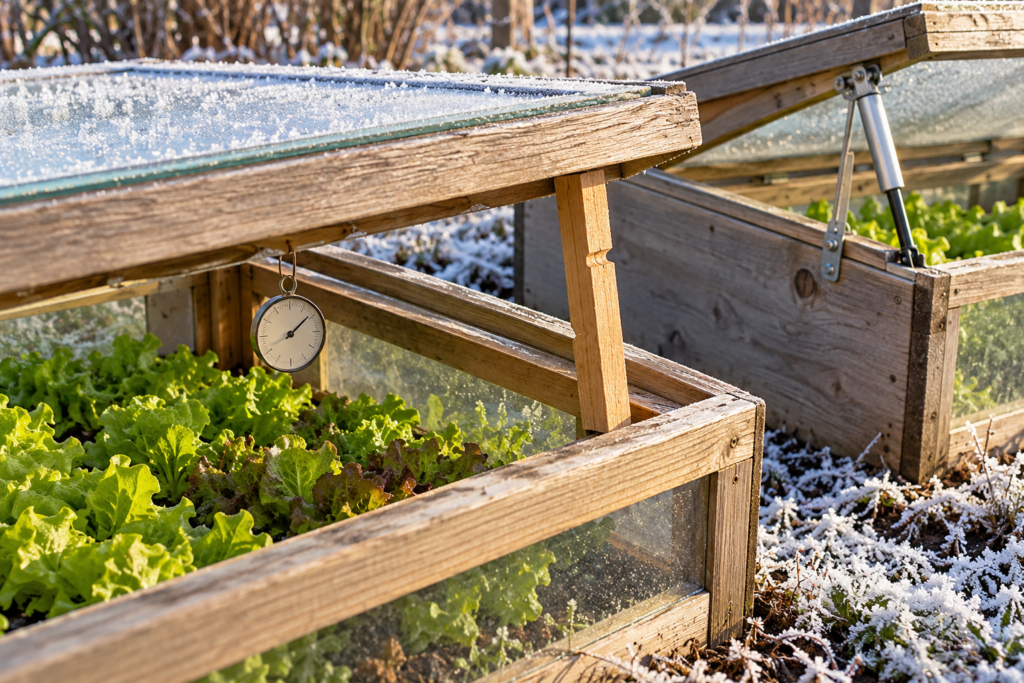
A max-min thermometer inside the frame, placed at plant height and out of direct sun, shows how hot and cold the frame actually gets while you’re not watching. Checking it for a week or two teaches you how your frame behaves in different weather.
Automatic Vent Openers
Automatic vent openers take the guesswork out of ventilation. These devices use a sealed cylinder of wax that expands as it warms, pushing the lid open without electricity, then closing it as temperatures fall. They’re especially useful if you’re away during the day, since sudden sunshine on a cold morning is exactly when frames overheat. Check that the opener you choose is rated for the weight of your lid.
Protecting Against Wind
Propped lids act like sails in strong wind and can be ripped from their hinges or slammed shut. Secure the prop stick firmly, fit a hook or chain to hold the lid at a set height, and close the frame when strong winds are forecast.
Keeping Plants Warm on Cold Nights
On especially cold nights, add extra protection:
- Cover the lid with an old blanket, a piece of carpet, a sheet of bubble insulation, or a layer of straw, removing it in the morning so light can reach the plants.
- Add an inner layer of frost cloth draped directly over plants inside the frame. Each layer of protection traps a little more warmth.
- Use thermal mass by placing dark-colored containers filled with water inside the frame. They absorb heat during the day and release it slowly overnight.
- Bank the outside walls with soil, straw bales, or bags of leaves to insulate the sides.
Snow on the Lid
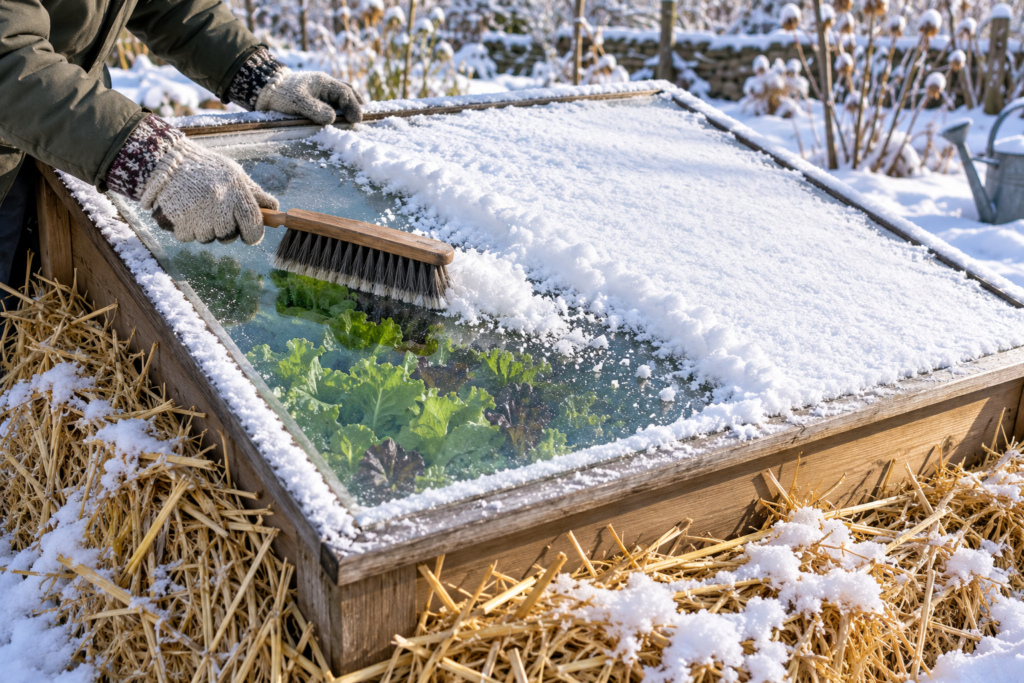
A thin layer of snow on a cold frame can act as insulation, but it also blocks light. Brush snow off the lid after storms, especially if cold weather will persist for several days. Heavy, wet snow can crack glass and strain hinges, so clear it promptly.
What to Grow in a Cold Frame Through the Year
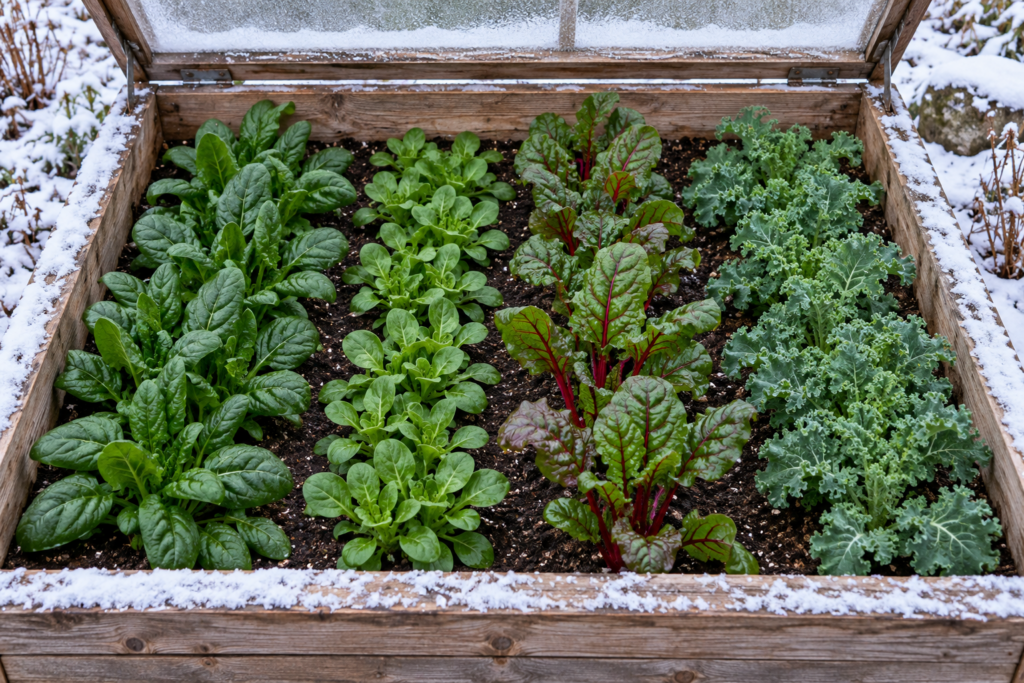
A cold frame earns its place across the whole year, but the crops and uses change with the seasons. Planning ahead ensures it’s working hard rather than sitting empty.
Late Winter and Early Spring
This is when a cold frame gives the biggest head start. Place the frame over the soil a couple of weeks before sowing to warm the ground, then sow cool-season crops directly inside several weeks before they could be sown in the open garden.
Good choices include lettuce, spinach, arugula, radishes, scallions, corn salad (mâche), Asian greens such as mizuna and bok choy, and baby kale. Peas and fava beans can also be started in the frame and transplanted outdoors later. Early crops of carrots and beets are possible in deeper frames with loose soil.
Cabbage, broccoli, cauliflower, and other brassica seedlings raised indoors can move into the frame to grow on before planting out.
Late Spring and Summer
As temperatures rise, the frame’s role changes. It becomes the ideal place to harden off warm-season seedlings, covered in the next section. Once the weather is reliably warm, remove the lid entirely or replace it with shade cloth to prevent overheating.
In cooler climates, gardeners sometimes keep a cold frame closed through early summer to grow heat-loving crops like melons, peppers, or cucumbers, which benefit from the extra warmth. In warmer climates, summer is often a rest period, or a time to start seeds for autumn crops under shade cloth.
Late Summer and Autumn
This is when you set up the frame for winter harvests. Sow or transplant winter greens in late summer and early autumn, so they reach a good size before days shorten dramatically. Once daylight falls below roughly ten hours a day, growth slows almost to a stop, and plants in the frame become more like a living refrigerator you harvest from rather than a crop that continues to grow.
Crops to sow for autumn and winter include spinach, corn salad, winter lettuce varieties, kale, chard, claytonia (winter purslane), arugula, mizuna, tatsoi, scallions, and parsley. The frame can also protect late crops of lettuce and Asian greens from the first frosts.
What Are the Best Crops to Grow in a Cold Frame Over Winter?
The best crops for winter cold frames are very cold-hardy greens: spinach, corn salad (mâche), claytonia, hardy kale, winter lettuce varieties, arugula, mizuna, tatsoi, and scallions. These tolerate freezing temperatures and recover quickly when the frame warms. Sow them by late summer or early autumn so they’re well grown before the shortest days.
Many cold-hardy crops also become sweeter after frost. Spinach, kale, and root crops convert some of their starches to sugars as protection against cold, which is why winter harvests from a frame often taste better than summer ones.
Overwintering Plants
Cold frames are excellent for sheltering potted perennials, shrubs, and cuttings through winter. They protect roots from freezing solid and keep crowns from sitting in cold, wet conditions, which causes more winter losses than cold alone. Borderline-hardy plants such as some herbs, young perennials, and hardwood cuttings benefit greatly from this protection.
Using a Cold Frame to Start and Harden Off Seedlings
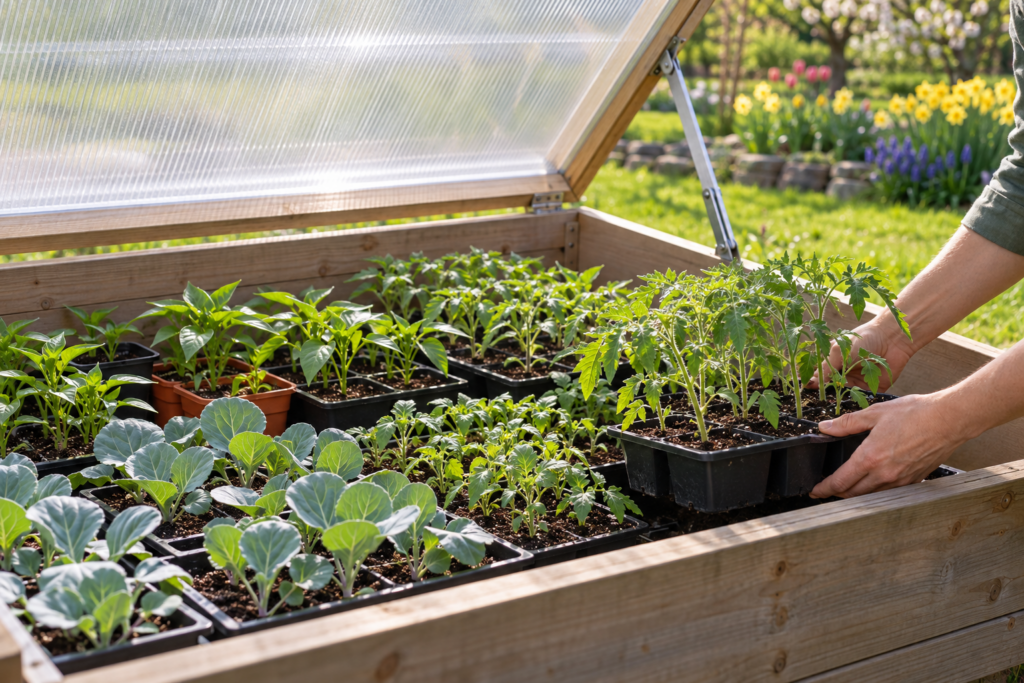
For many gardeners, the cold frame’s most valuable job is preparing seedlings raised indoors for life outside. It bridges the gap between the stable conditions of a windowsill or grow light and the sun, wind, and temperature swings of the open garden.
Why Hardening Off Matters
Seedlings raised indoors grow soft, tender leaves that have never experienced direct sun, wind, or cool nights. Planting them straight outside often causes transplant shock, with scorched or bleached leaves, wilting, and stalled growth that can set plants back for weeks. Hardening off gradually toughens their leaves and stems, thickening the waxy leaf coating and strengthening their tissues.
A Simple Hardening-Off Schedule
Hardening off in a cold frame usually takes one to two weeks:
- Days 1–3: Move seedlings into the frame. Keep the lid closed or open only slightly during the day, and closed at night. Shade the frame with a light cloth on very bright days.
- Days 4–6: Open the lid wider during the day, a few inches to halfway. Close it at night.
- Days 7–10: Open the lid fully during the day. Leave it partly open at night if temperatures stay safely above freezing for tender crops.
- Days 11–14: Leave the lid open day and night, closing it only if frost threatens. Plants are now ready to transplant.
Tender crops such as tomatoes, peppers, squash, and basil need nighttime temperatures safely above about 50°F (10°C) before the frame is left open overnight. Hardier crops like brassicas and lettuce can handle cooler nights sooner.
Starting Seeds in the Frame
A cold frame is also a good place to sow seeds in trays and pots, especially hardy annuals, perennials, and cool-season vegetables. Set trays on a layer of gravel or directly on the soil inside the frame, water them from below where possible, and cover newly sown trays with a sheet of newspaper or light fabric until seeds germinate. Some perennial and tree seeds need a period of cold to germinate, and sowing them in a cold frame through winter provides natural cold stratification.
Care, Maintenance, and Common Problems
A cold frame is simple, but a few habits keep plants healthy and the structure in good shape.
Watering
Plants in a cold frame need far less water in winter than in spring and summer, since cool temperatures and short days slow growth and evaporation. Check the soil by pushing a finger an inch or two into it, and water only when it feels dry. Overwatering in cold weather leads to rot and fungal disease.
Water in the morning on a mild day, aiming at the soil rather than the leaves, so any moisture on foliage has time to dry before the frame closes for the night. In spring, as temperatures rise, watering needs increase quickly, so check more often.
Soil
Use rich, well-drained soil inside the frame. Adding compost each season keeps it fertile and improves its ability to hold warmth and moisture. Soil that stays waterlogged remains cold and invites root problems, so improve drainage if water pools after rain.
Pests
Cold frames provide shelter for pests as well as plants. Slugs and snails often hide inside, particularly around the edges, so check regularly, especially on mild, damp evenings. Aphids can build up on overwintering plants. Mice and voles are attracted to the warm, sheltered space and may eat seeds, seedlings, and roots. A layer of hardware cloth under the frame and around any gaps keeps rodents out.
Disease
The still, humid air inside a closed frame favors fungal diseases such as damping off, gray mold, and powdery mildew. Ventilate on every mild day, remove dead or damaged leaves promptly, avoid overcrowding, and water sparingly in cold weather.
Keeping the Lid Clean
Dirt, algae, and leaves on the lid reduce the light reaching plants, which matters most in winter when light is already scarce. Wipe or rinse the lid inside and out regularly, especially at the start of autumn and winter.
Seasonal Maintenance
Check hinges, props, and seals each season. Repair cracked glazing, tighten screws, and treat or replace rotting timber. When a frame isn’t in use in summer, store the lid somewhere safe or remove it to prevent damage.
Common Cold Frame Mistakes
Letting the frame overheat. Forgetting to vent on a sunny day is the most common way to lose cold frame crops. Check it daily in changeable weather or install an automatic opener.
Sowing winter crops too late. Crops sown after early autumn may not grow large enough before short days halt their growth.
Overwatering in winter. Cold, wet soil causes rot. Water sparingly and only on mild mornings.
Placing the frame in shade. A frame in winter shade gathers little heat and grows little.
Leaving gaps around the base. Gaps let heat escape and pests enter. Bank soil or straw around the outside.
Ignoring ventilation in spring. Spring days can switch from cold to hot quickly, making careful venting critical.
A cold frame asks for a few minutes of attention on most days, a quick look at the thermometer, a prop of the lid, a check on the soil, but in return it quietly adds weeks to both ends of the growing year.
Frequently Asked Questions
Does a cold frame need a bottom?
No, a cold frame is normally bottomless so plants can root directly into the soil beneath, which also stores and releases warmth. If you need to use a frame on a patio or other hard surface, grow plants in trays or pots inside it, and set them on a layer of gravel or boards to improve drainage and insulation.
Can you grow tomatoes in a cold frame?
Cold frames are great for starting and hardening off tomato seedlings in spring, but most frames are too low to grow tomato plants to full size. In cooler climates, compact bush or dwarf varieties can be grown in a tall frame through early summer, with the lid removed or propped wide as plants grow and temperatures rise.
Can I turn a raised bed into a cold frame?
Yes. Adding a hinged, transparent lid to a raised bed turns it into a cold frame. Build a simple sloping frame to fit the top of the bed, or lay polycarbonate panels over hoops. Raised beds work especially well because their soil warms quickly and drains freely, both advantages in early spring.
When should I set up a cold frame?
For spring crops, set up the frame in late winter, about two weeks before you plan to sow, so the soil inside can warm up. For winter harvests, have the frame ready by late summer or early autumn, when you sow or transplant cold-hardy greens. Many gardeners leave a permanent frame in place year-round.
What is the difference between a cold frame and a hotbed?
A cold frame relies solely on the sun for warmth. A hotbed is a cold frame with an added heat source beneath the soil, traditionally a layer of fresh manure that generates heat as it decomposes, and today more often an electric soil-heating cable. Hotbeds allow earlier sowing and warmer-loving crops but take more effort and cost to run.
How do I stop condensation in a cold frame?
Some condensation in a closed cold frame is normal, especially on cold mornings. To reduce it, ventilate on every mild day, even briefly, water in the morning rather than the evening, and avoid overwatering in winter. Excess condensation that drips onto plants for long periods encourages fungal diseases.
Can you use a cold frame in a warm climate?
Yes. In warm and mild-winter climates, a cold frame protects crops during occasional cold snaps and frosty nights, and supports winter salad crops. It needs much more careful ventilation, since frames overheat quickly in strong sun. Many warm-climate gardeners replace the lid with shade cloth in hotter months.
Keep Learning
For more beginner help, see How to Start a Garden: The Complete Beginner’s Guide, How to Start a Vegetable Garden: Step-by-Step Guide for Beginners, and Companion Planting Guide: What to Plant Together and What to Keep Apart.