
Essential Gardening Tools and Equipment: A Complete Buyer’s Guide
Walk into any garden center in March and you’ll find an entire aisle of things you don’t need. Colour-coded plastic sets, gadgets for dibbing perfectly uniform holes, weeders shaped like alien instruments. Meanwhile, the gardener who has been growing for thirty years is probably using six tools, four of them inherited, all of them sharpened….
Walk into any garden center in March and you’ll find an entire aisle of things you don’t need. Colour-coded plastic sets, gadgets for dibbing perfectly uniform holes, weeders shaped like alien instruments. Meanwhile, the gardener who has been growing for thirty years is probably using six tools, four of them inherited, all of them sharpened.
Buying tools well comes down to two ideas. First, a small number of genuinely good tools will outperform a large collection of mediocre ones, and they’ll still be working when the cheap set has snapped at the neck. Second, the right tool depends on your soil, your body, and what you actually grow. Someone with heavy clay and fruit trees needs a different kit from someone growing salad in raised beds on a balcony.
This guide covers what belongs in a starter kit, what to add as your garden grows, how to judge quality before you hand over money, and how to look after everything so it lasts. Prices and brands come and go. Construction, steel, and fit don’t.
How to Judge a Gardening Tool Before You Buy It
Most tool failures are predictable if you know where to look. Handles snap where they meet the head. Blades bend because the steel is too soft. Cheap pruners go blunt in a season and can’t be sharpened because the edge was never properly ground. A few minutes of inspection saves years of irritation.
Check how the head meets the handle. On digging tools, the strongest construction is a solid socket, where the metal head is forged as a continuous sleeve that the handle slides into. Next best is a strapped construction, with metal straps running up either side of the handle and riveted through. Avoid tools where a thin tang is simply pushed into a hole in the handle and glued or pinned, which is the standard failure point on budget spades and forks.
Look at the metal. Stainless steel resists rust, slides through soil with less drag, and cleans easily, which makes it a pleasure in clay. Carbon steel is harder, holds a sharper edge, and is generally preferred for cutting tools, though it will rust if you leave it out in the rain. Forged tools, where the metal is heated and shaped under pressure, are considerably stronger than stamped tools cut from flat sheet. Stamped tools feel light and flat; forged ones feel dense and have visible thickness variation.
Handle it before you commit. This matters more than people expect. Ash and hickory absorb shock well and flex slightly under load, which is easier on your wrists than fibreglass. Hardwood handles can also be replaced when they break, while a one-piece plastic tool is simply finished. Check the grain runs straight along the length of the handle rather than at an angle across it, because angled grain is where wood splits.
Match the length to your body. Long-handled tools should reach roughly to your shoulder or chin when stood on end, depending on the tool. A digging spade that’s too short forces you to bend at the back rather than the knees, and that’s how gardening starts hurting.
Test the moving parts. On secateurs, open and close them several times. The action should be smooth, not gritty. Look for a bolt you can adjust and, ideally, replaceable blades and springs. A cutting tool that can’t be taken apart can’t be maintained.
Are expensive gardening tools worth it?
For tools that take real force or need a sharp edge, yes. A forged spade, a good fork, and quality secateurs will outlast a dozen budget versions and work better every time you pick them up. For tools that mainly move air or leaves, like a plastic leaf rake or a basic watering can, mid-range is genuinely fine.
The sensible approach is to spread your money unevenly. Put it into the three or four tools you’ll touch every single session, and be relaxed about the rest. Second-hand tools are also worth hunting for, because older forged steel is often superior to what’s sold new at the same price, and a rusty spade with a sound handle cleans up in an afternoon.
The Hand Tools You’ll Reach for Every Single Day
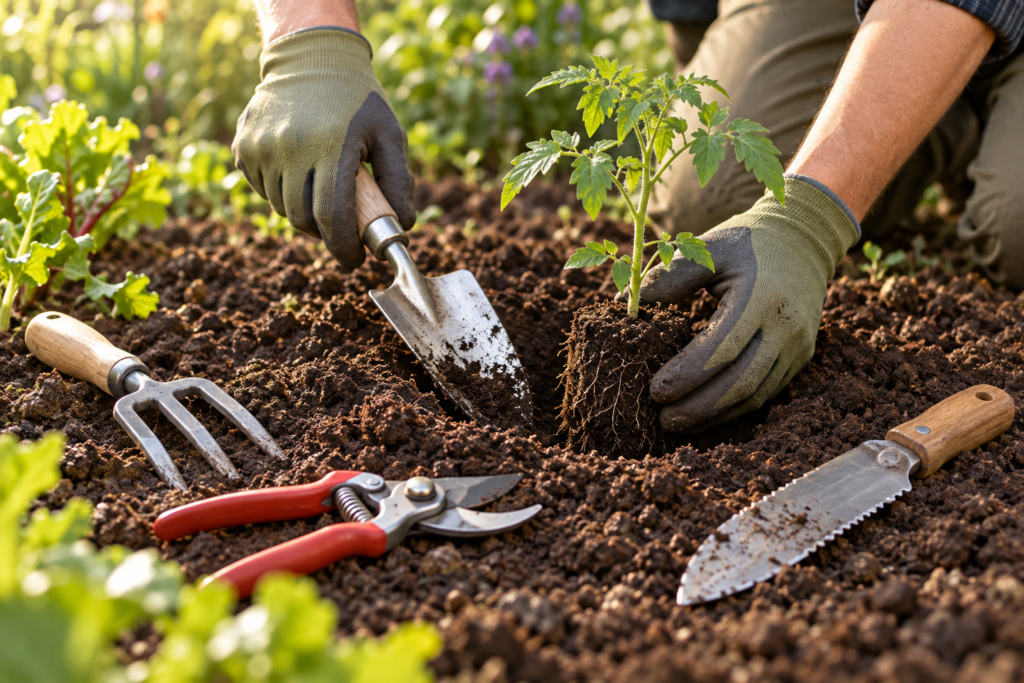
These are the tools that live in your bucket or trug and get used every time you step outside. If you buy nothing else well, buy these well.
Hand trowel. The single most used tool in most gardens. Look for a one-piece forged head and neck, because the join between blade and handle is where cheap trowels bend and snap. A narrow blade suits planting bulbs and working between established plants; a broader one moves more soil per scoop. Some have depth markings stamped into the blade, which is genuinely handy for bulb planting.
Hand fork. Better than a trowel for loosening compacted soil around roots, teasing apart potbound plants, and lifting weeds with the roots intact. Again, look for solid forged construction rather than thin prongs riveted to a plate.
Secateurs, also called hand pruners. Buy these once and buy them properly. Bypass secateurs have two curved blades that pass each other like scissors, giving a clean cut on living stems, and they’re the right default for almost all garden pruning. Anvil secateurs press a single blade against a flat plate, which crushes green stems but works well on dead, dry wood. Look for replaceable blades, an adjustable tension bolt, a safety catch you can operate with one hand, and a size that closes comfortably in your grip. There are ratchet models that multiply your force, which are excellent if you have arthritis or reduced hand strength.
A weeding tool. Which one depends on your weeds. A long, narrow dandelion weeder with a forked tip lifts taproots out whole. A Cape Cod weeder or a small hand hoe slices annual weeds off just below the surface, which is faster across a bed. A hori hori, the Japanese soil knife, is arguably the best value tool in gardening: it’s a heavy, slightly concave blade with one serrated edge and one straight edge, and it digs, cuts roots, slices open compost bags, divides perennials, and weeds. Many gardeners end up using it instead of a trowel.
Gloves. Have two pairs. A thin, close-fitting pair with a coated palm for planting and weeding, where you need to feel what you’re doing, and a thicker leather or thorn-resistant pair for pruning roses, handling brambles, and moving anything sharp. Gloves that are too bulky get taken off and left somewhere, which defeats the purpose.
A bucket or garden trug. Unglamorous and constantly useful. It carries tools out, weeds back, and doubles as a harvest container and a mixing vessel for potting compost.
What tools do I need to start a garden?
A beginner needs five things: a hand trowel, a hand fork, bypass secateurs, a pair of gloves, and a watering can or hose. Add a garden fork and a spade if you’re working in-ground soil rather than raised beds or containers. Everything beyond that can wait until a specific job demands it.
That’s the honest list. Resist buying a boxed starter set, which typically includes two tools you’ll use and several you won’t, all made to the same low standard. Buy the five properly, use them for a season, and let your actual frustrations tell you what to buy next. The tool you keep wishing you had is the one worth money.
Long-Handled Tools for Digging, Moving Soil, and Weeding
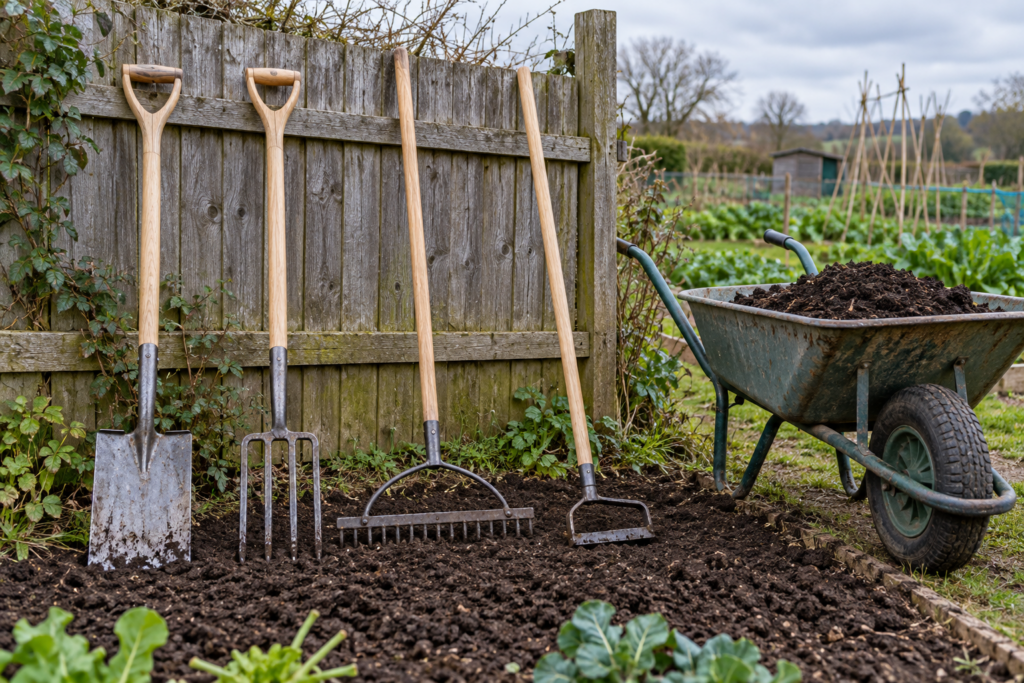
Once you’re working ground rather than pots, leverage matters. These tools let you use your legs and body weight instead of your back and arms.
What’s the difference between a spade and a shovel?
A spade has a flat, straight-edged blade with squared sides, designed for cutting cleanly into soil, edging beds, and slicing through turf and roots. A shovel has a curved, scooped blade with a pointed or rounded tip, designed for lifting and moving loose material like compost, gravel, or soil. Spades cut; shovels scoop.
Most home gardeners need a spade more than a shovel. A border spade, which has a smaller head than a full digging spade, is easier to control and perfectly adequate for planting, edging, and digging in established beds. If you’re regularly shifting bulk deliveries of compost or bark, a shovel earns its place quickly.
Garden fork. In heavy or stony soil, a fork does what a spade struggles to. Four sturdy tines slide into compacted ground, and levering the handle back cracks the soil open without slicing worms or roots in half. It’s also the right tool for lifting potatoes, dividing established perennials, and turning a compost heap. A border fork is the smaller version and is easier to use in tight planting.
Rake. Two different tools share the name, and you probably want both eventually. A garden rake, sometimes called a soil or bow rake, has short rigid steel tines and a heavy head for levelling seedbeds, breaking up clods, and spreading mulch. A leaf rake, with a wide fan of flexible plastic or springy metal tines, gathers leaves and clippings without tearing up lawn.
Hoe. The fastest weeding tool ever invented, and badly underused by home gardeners. A Dutch hoe, sometimes called a push hoe, is pushed forward just under the surface to slice weed seedlings off at the roots. A draw hoe is pulled toward you and is better for chopping tougher weeds and drawing seed drills. An oscillating or stirrup hoe cuts on both the push and the pull, which makes it very efficient in beds. The trick with all of them is to hoe weeds when they’re tiny and the surface is dry, so the severed seedlings shrivel in the sun rather than re-rooting.
Wheelbarrow or garden cart. Once you’re moving compost, prunings, or bags of soil, carrying things by hand stops being viable. A traditional single-wheel barrow is manoeuvrable and tips easily but needs balance. A two-wheeled cart is far more stable for heavy loads and much kinder if you have back problems. Check the tyre: a pneumatic tyre rolls over rough ground and lawn far better than solid plastic, though it will need occasional inflating.
Edging tool. A half-moon edger cuts crisp lines between lawn and border. It’s a single-purpose tool, but nothing else does the job as neatly, and clean edges make an ordinary garden look considerably more cared for.
Pruning and Cutting Equipment
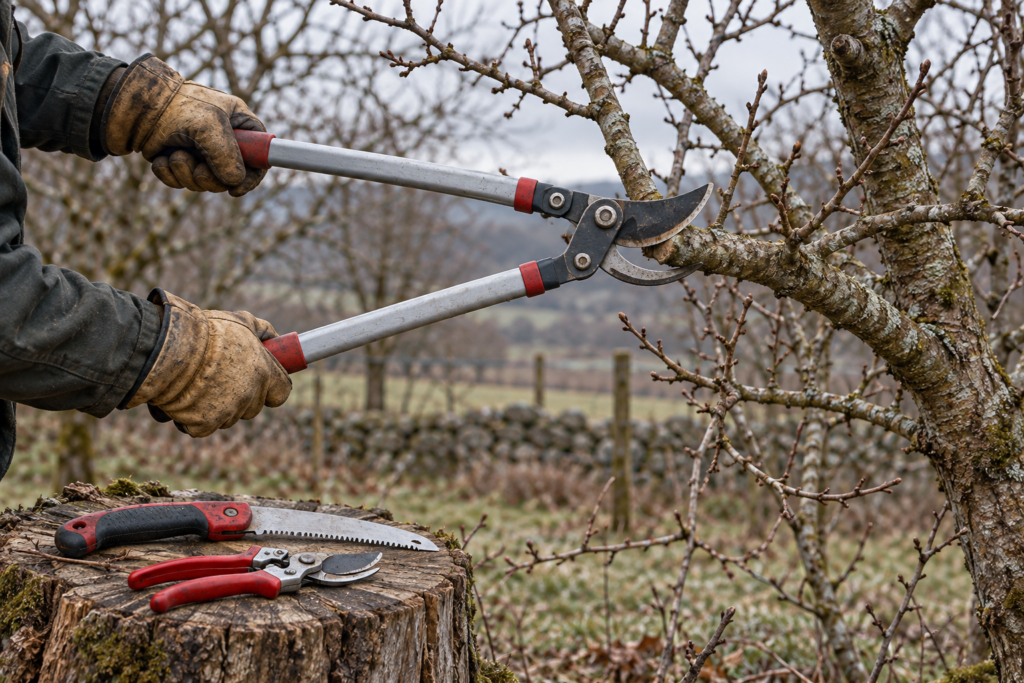
Pruning tools work on a simple principle: match the tool to the thickness of the wood, and never force a tool past its capacity. Forcing is how blades bend, bolts loosen, and cuts turn ragged, and ragged cuts heal poorly and invite disease.
Secateurs handle stems up to roughly finger thickness. Beyond that, stop.
Loppers are long-handled versions with the same bypass or anvil mechanism, giving you both reach and leverage for branches up to around an inch and a half, depending on the model and the wood. Some have telescopic handles or a compound gear mechanism that significantly reduces the effort needed. Heavy, and worth keeping for the jobs that actually need them.
Pruning saw. Once a branch is too thick for loppers, you need a saw, and a proper pruning saw is nothing like a carpentry saw. The teeth are widely spaced to clear damp sawdust, and most cut on the pull stroke, which gives you control and lets the blade be thinner. Folding models are safe to carry in a pocket; fixed-blade versions with a sheath are more rigid for bigger work. A curved blade suits cutting above your head.
Hedge shears. Manual shears give a better finish than a powered trimmer on small formal hedges, topiary, and box balls, and they’re quiet enough to use early on a Sunday. Look for a shock absorber between the handles and blades that can be sharpened.
Powered options. Electric or battery hedge trimmers, strimmers, and chainsaws make sense when the scale genuinely justifies them, which usually means long hedges or serious tree work. Battery tools have improved considerably and are lighter and quieter than petrol equivalents, and sticking to one battery platform across several tools saves both money and clutter. Be realistic about tree work, though. Anything involving a chainsaw above shoulder height or near power lines belongs with a qualified arborist, not with a homeowner on a ladder.
A note that applies across all of these: disinfect blades between plants when you’re pruning anything diseased, or when moving between roses, fruit trees, or tomatoes. A wipe with rubbing alcohol takes seconds and stops you carrying pathogens from one plant to the next on a blade.
Watering Gear, Containers, and Everything That Protects You
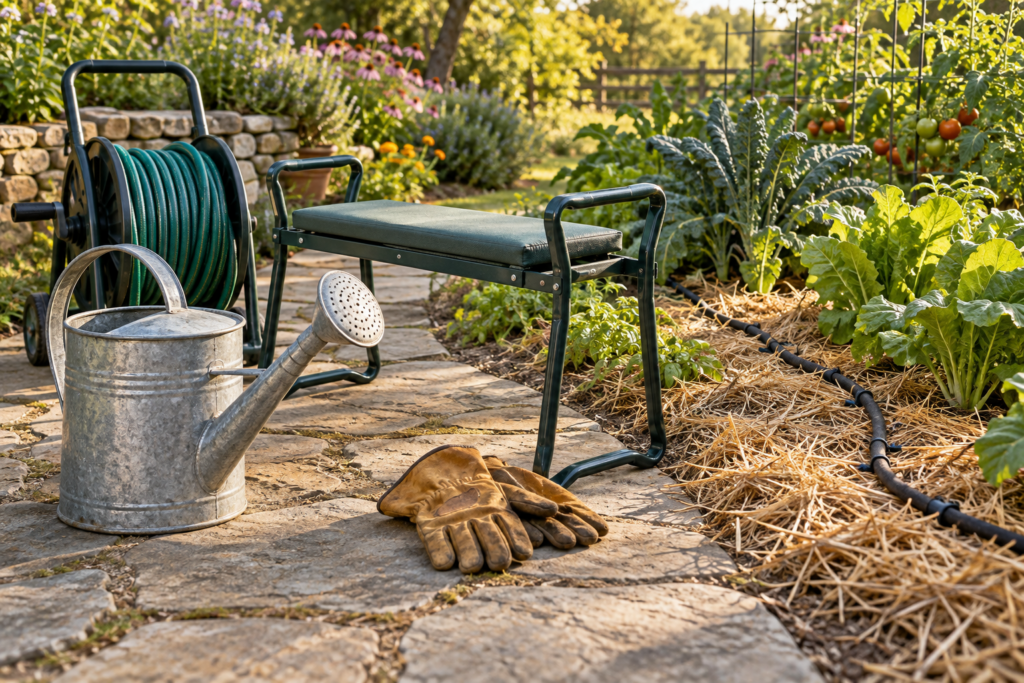
Watering equipment gets bought carelessly and then used more than almost anything else.
Watering can. Choose one with a detachable rose, the perforated head that breaks the flow into droplets. A fine rose is essential for seedlings, which a direct jet will flatten. Metal cans last longer and balance better; plastic is lighter, which matters when full. Two smaller cans are often easier to carry than one large one, because they balance the load across both arms.
Hose and fittings. Look at the hose construction rather than the price. Multi-layer reinforced hoses resist kinking, which is the thing that will make you hate a cheap hose within a month. Buy a hose long enough to reach your furthest bed, and store it on a reel rather than coiled on the ground where it gets trodden on and developing permanent kinks. Quick-connect fittings are worth standardising across all your attachments.
Targeted watering systems. Soaker hoses and drip irrigation deliver water directly to the root zone, waste far less to evaporation, and keep foliage dry, which reduces fungal problems. Paired with a simple timer on the tap, they solve the summer holiday problem and save a surprising amount of water. For containers, self-watering pots with a reservoir buy you an extra day or two in hot weather.
Water butt. Collecting rainwater from a roof downpipe gives you free, unchlorinated water at ambient temperature, which many plants prefer. Fit a lid, both to keep debris out and to keep it safe around children and wildlife.
Sprayer. A hand-pump pressure sprayer is useful for applying diluted feeds, horticultural soap, and foliar sprays. Label it and keep separate sprayers for different products, because residue in a shared sprayer causes real damage.
Kneeler or kneeling pad. A foam pad is cheap and saves your knees. A folding kneeler bench that flips over to become a seat with handles is a small piece of equipment with an outsized effect on how long you can comfortably work, and it helps enormously with getting back up.
Protective gear. Safety glasses when strimming or cutting anything that flicks debris. Ear protection for powered tools. Sturdy closed shoes or boots, because a spade landing on a canvas shoe is a memorable mistake. A wide-brimmed hat and sun protection, since gardening involves far more sun exposure than people account for.
Storage and odds and ends. Garden twine, plant labels and a pencil, a tarpaulin for gathering prunings and protecting lawn, stakes and soft ties, and a tool bag or bucket organiser so things stop disappearing into the shrubbery. A sturdy shed hook rail keeps long-handled tools off a damp floor.
Keeping Tools Sharp, Clean, and Working for Decades
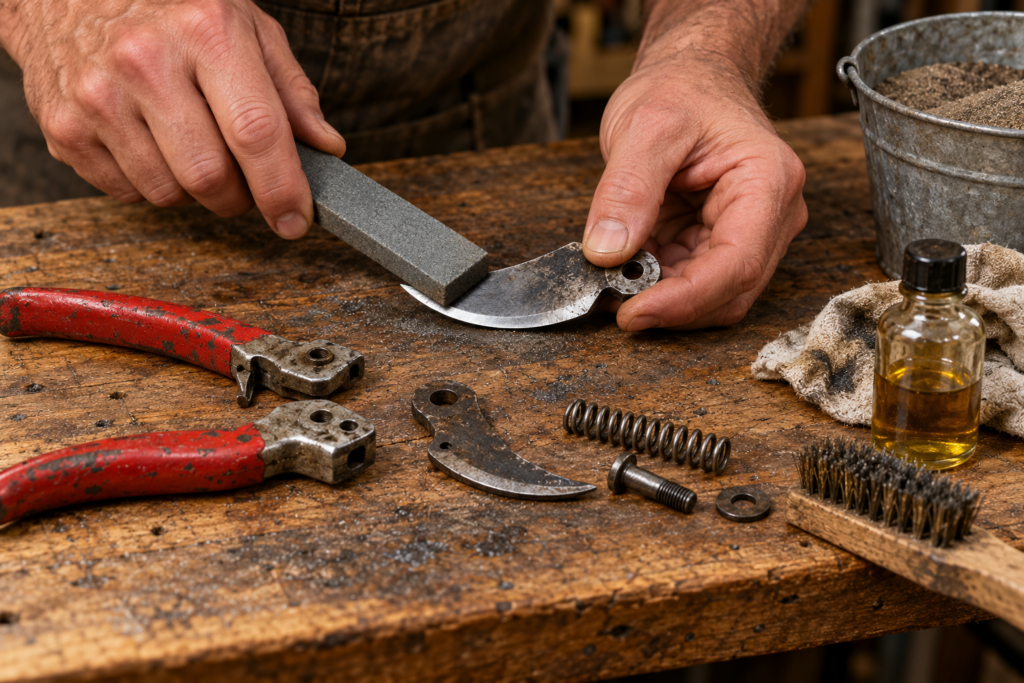
A well-maintained cheap tool outperforms a neglected expensive one. Maintenance is also genuinely quick once it’s habitual, and it turns an annual purchase into a lifetime one.
Clean after every session. Knock soil off with a stiff brush or a wooden scraper, then wipe the metal dry. Soil holds moisture against steel, and moisture is what starts rust. This takes under a minute and is the single highest-return habit in tool care.
Oil the metal. After cleaning, wipe blades and heads with a lightly oiled rag. Any light machine oil works, as does boiled linseed oil, which also feeds wooden handles. A classic shed fixture is a bucket of sand mixed with a little oil: plunge a spade or fork in and out a few times and it comes out scoured and lightly coated.
Care for wooden handles. Once or twice a year, sand off any roughness with fine sandpaper and rub in linseed oil. Dry, grey, splintery handles crack, and they give blisters. A little oil keeps them smooth and sound for decades.
How do I sharpen pruning shears and garden tools?
Use a flat mill file or a sharpening stone, held at the angle already ground onto the blade, usually around twenty degrees. Push the file in one direction only, following the existing bevel, and never file the flat back face of a bypass blade. A few strokes restore the edge; heavy grinding removes more metal than necessary.
Digging tools benefit from sharpening too, which surprises most people. A spade with a sharpened leading edge slices through roots and compacted soil with noticeably less effort. Use a coarse file at a shallow angle on the inner face of the blade, aiming for a working edge rather than a razor. Hoes want the same treatment, because a sharp hoe cuts weeds while a blunt one drags them.
For secateurs, take them apart once a year if the design allows. Clean sap and grit off both blades, sharpen the bevelled cutting blade, wipe everything with oil, and reassemble with the tension bolt tightened just enough that the blades pass closely without binding. Sap remover or a little solvent on a cloth shifts the sticky residue that makes the action gritty.
Store tools properly. Hang them rather than standing them on a concrete floor, where moisture wicks up into handles. Keep cutting tools sheathed or closed. Somewhere dry matters more than somewhere warm.
Winter is the right time for a full service. When the garden slows down, work through everything: clean, sharpen, oil, tighten loose bolts, replace worn springs and blades, treat handles, and drain and store hoses and sprayers somewhere they won’t freeze. Empty water butts of debris. Service or charge batteries and store them at the recommended level rather than fully flat. You’ll start spring with a shed full of tools that work instead of a list of things to fix.
Repair before replacing. Wooden handles can be replaced on socketed tools, which is why solid construction matters so much. Secateur blades, springs, and bolts are often available as spares. A bent tine on a good fork can sometimes be worked back. The tools that last generations are the ones somebody kept mending.
Frequently Asked Questions
What are the most essential gardening tools for a small garden or balcony?
For containers and small spaces, a hand trowel, a hand fork, bypass secateurs, gloves, and a watering can with a fine rose will cover nearly everything. Add a small pair of snips for harvesting herbs and deadheading, and a compact hand rake for tidying pots. Long-handled digging tools generally aren’t needed unless you have in-ground beds.
Should I buy stainless steel or carbon steel garden tools?
Stainless steel resists rust, cuts through sticky clay with less drag, and needs less upkeep, which makes it a strong choice for digging and soil tools. Carbon steel is harder, takes and holds a finer edge, and is usually better for cutting tools like secateurs, saws, and knives, but it will rust if left damp. Many gardeners end up with a mix of both.
How often should I sharpen my gardening tools?
Sharpen secateurs and other cutting tools whenever the cut starts tearing rather than slicing cleanly, which for regular use often means every few weeks in the growing season. Spades, hoes, and shears can be checked a couple of times a year and before heavy use. A light touch-up done often is far better than a major grind done rarely.
Do I need a lawn mower if I only have a small lawn?
For a very small patch, a manual push reel mower is quiet, needs no fuel or charging, requires almost no maintenance, and cuts grass cleanly. For anything larger or rougher, a battery or electric mower is easier. Match the cutting width and power source to the size of the lawn rather than buying the largest machine you can afford.
What gardening tools are best for people with arthritis or limited hand strength?
Look for ratchet secateurs and ratchet loppers, which cut in stages and dramatically reduce grip force. Ergonomic tools with thick, cushioned, angled handles keep the wrist in a neutral position. Long-handled versions of trowels and weeders reduce bending, and a kneeler bench with side handles helps with getting up and down. Lightweight aluminium and carbon fibre handles cut the load further.
Can I use kitchen scissors or a household knife instead of proper garden tools?
For light jobs like snipping herbs, kitchen scissors are fine. For anything woody, they crush stems rather than cutting cleanly, which damages the plant and ruins the scissors. Garden tools are built with harder steel, different blade geometry, and enough leverage to make clean cuts, and proper pruning cuts heal better and reduce disease risk.
How should I store garden tools over winter?
Clean and dry everything, oil the metal and wooden handles, then hang tools off the floor in a dry shed or garage. Drain hoses completely and store them coiled indoors or somewhere frost-free, and empty sprayers and watering cans. Remove batteries from powered tools and store them at a partial charge in a cool, dry place rather than outdoors.
What garden tools do beginners buy that they don’t actually need?
Boxed multi-tool sets, novelty weeders, specialist bulb planters, and powered equipment bought before the garden is large enough to need it are the most common regrets. Buying a smaller number of well-made general tools first, then adding specialist items only when a specific job keeps proving difficult, avoids nearly all of this.
Keep Learning
For more beginner help, see How to Start a Garden: The Complete Beginner’s Guide, How to Start a Vegetable Garden: Step-by-Step Guide for Beginners, and Gardening as a Hobby: How to Get Started and Stick With It.

One Comment